Go IAM is designed with multi-tenancy at its core, using Projects to provide complete isolation between different applications and environments. This guide will walk you through the essential steps to get started with Go IAM.
🏗️ Getting Started
To use Go IAM effectively, you need to set up:
Project - Your isolated workspace
Client - Frontend or Backend application configuration
Everything in Go IAM operates within the context of a Project, ensuring complete data isolation and security
📁 Projects
Projects are the foundation of Go IAM's multi-tenant architecture. Each project provides an isolated environment for your applications, users, roles, and resources.
Default Project
When Go IAM is first set up, a Default Project is automatically created. This project is intended for:
Administrative purposes - Managing Go IAM itself
System configuration - Initial setup and testing
💡 Best Practice: Create a separate project for each of your applications rather than using the Default Project for production workloads.
Accessing Projects
You can access projects through:
Navbar - Quick project switcher in the top navigation
Settings Menu - Full project management under Projects
➕ Creating a New Project
Steps to Create
Navigate to Projects
Go to Settings → Projects
Or use the navbar project selector
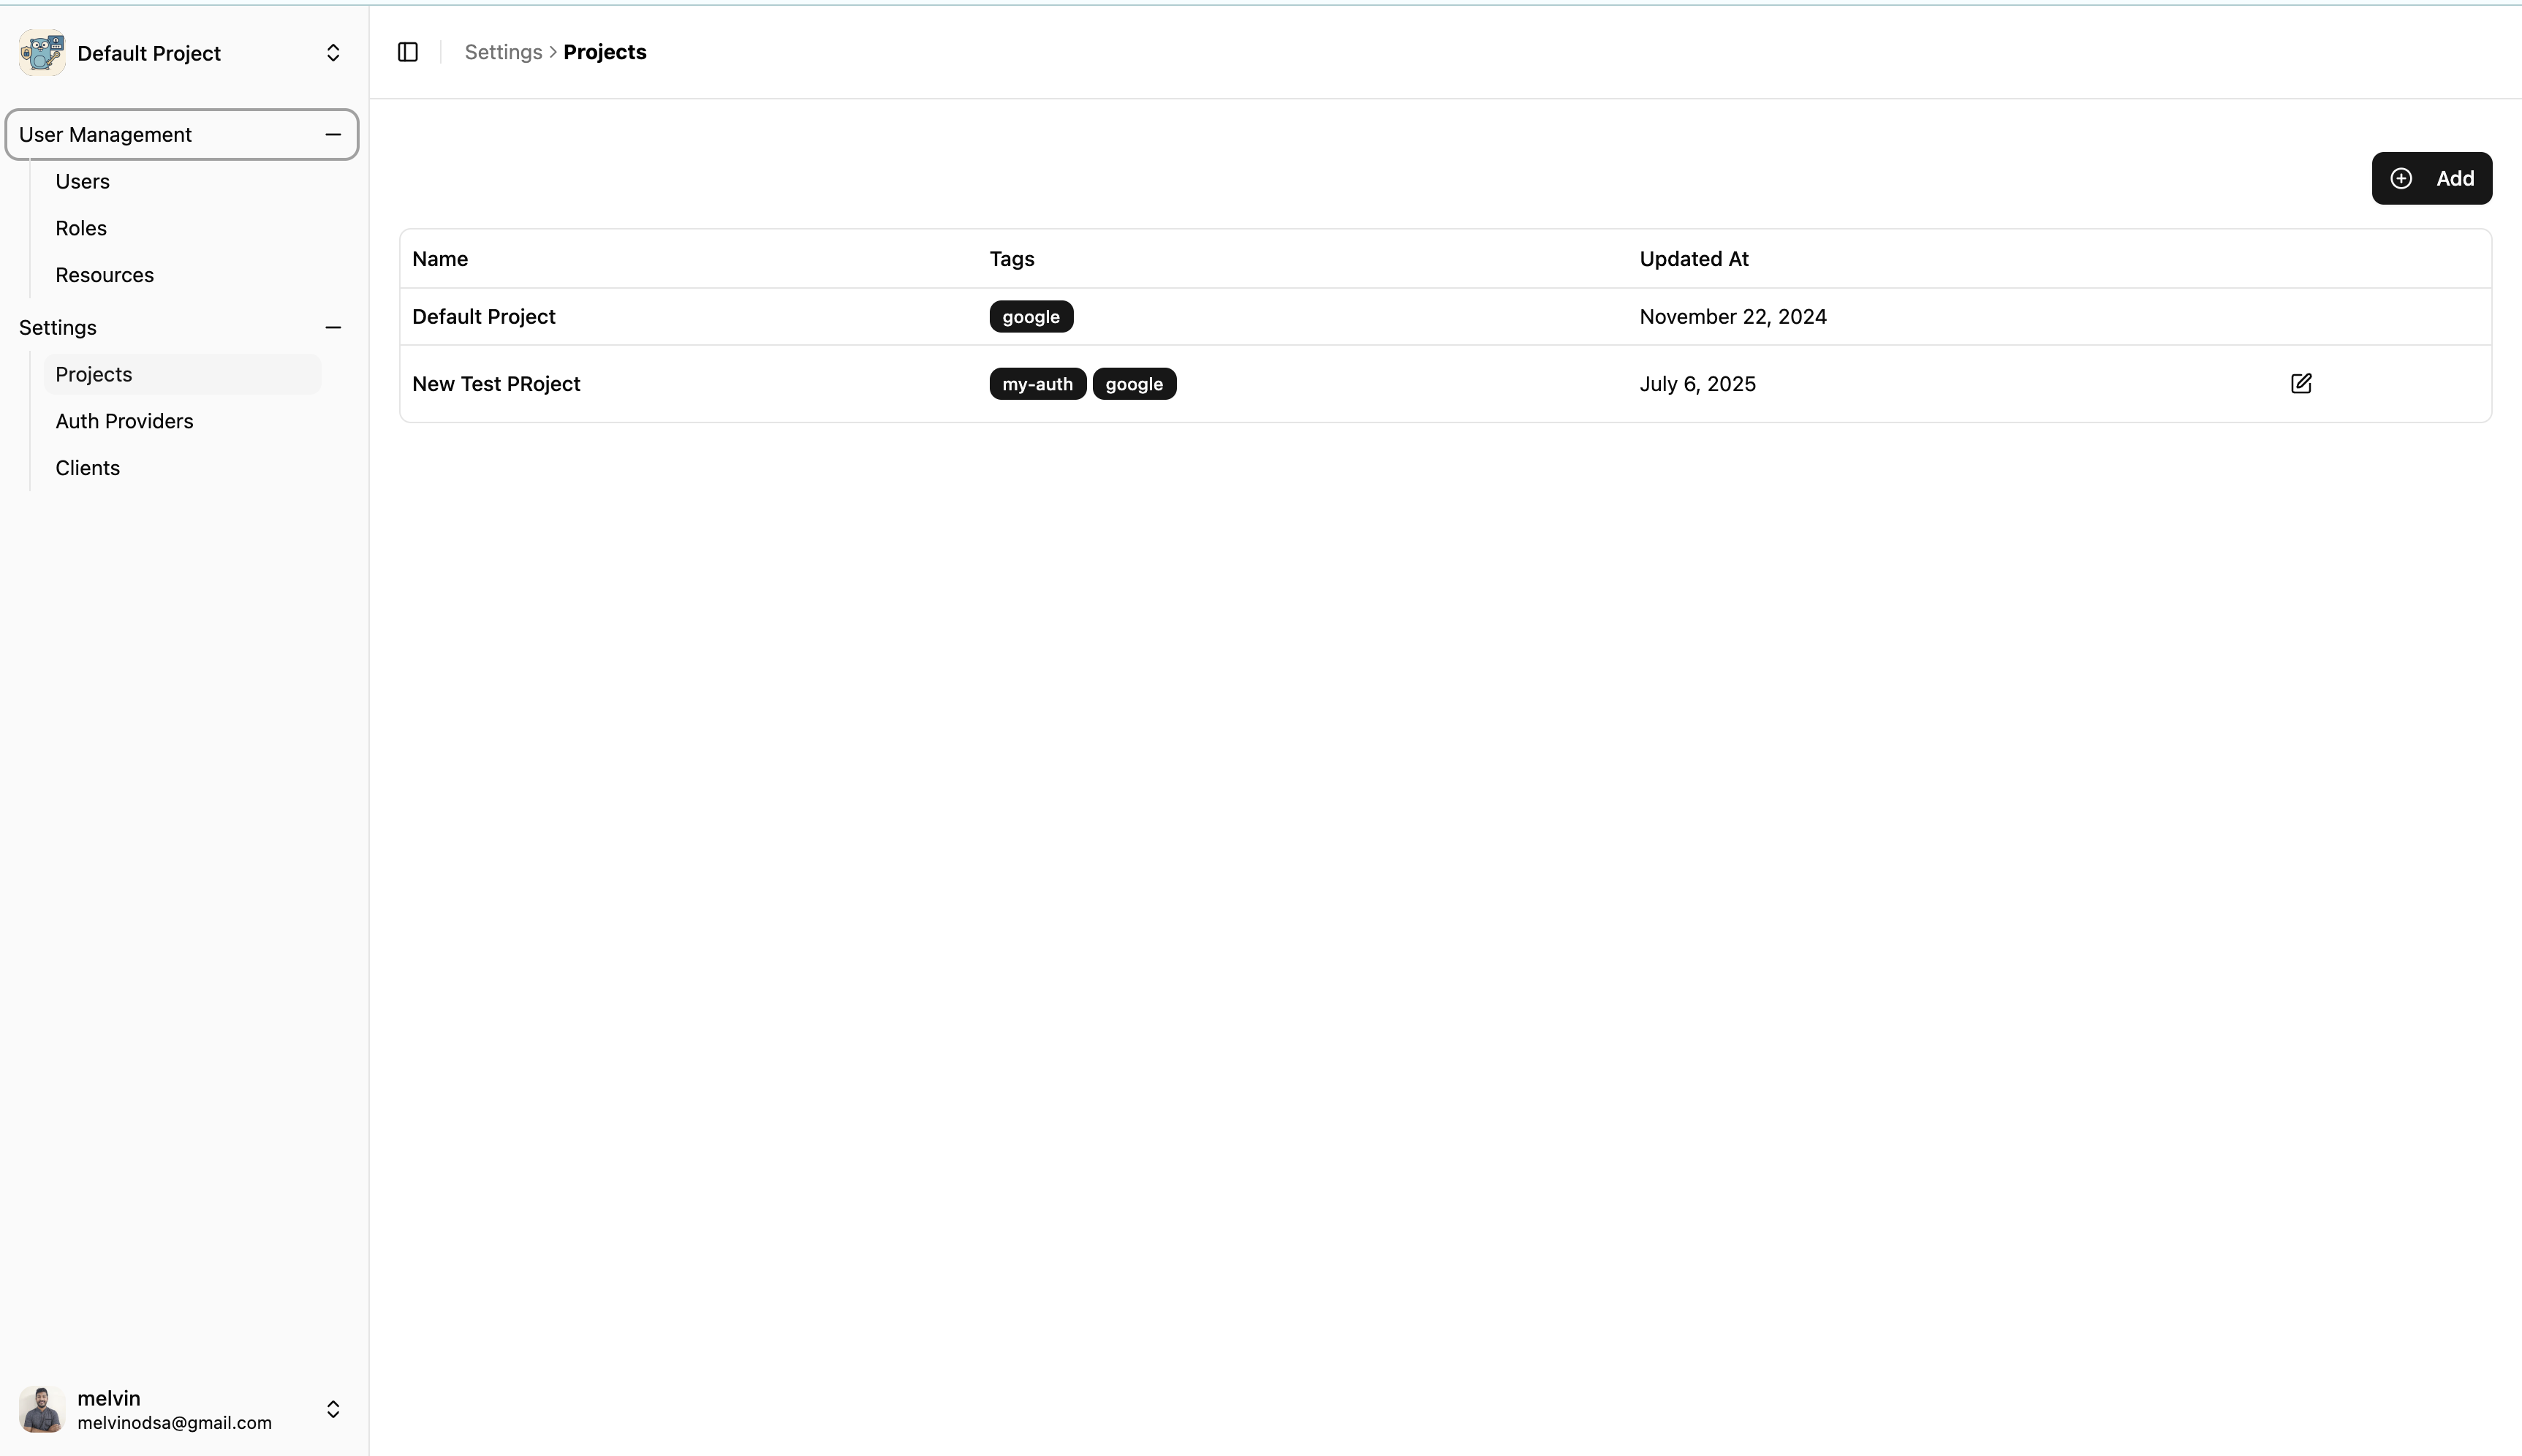
List Projects Page
Add New Project
Click the Add button in the top-right corner
Fill in the project details:
Name: Descriptive project name
Tags: Categorization labels
Description: Project purpose and details
Save Project
Click Save Changes button
Your new project is now ready to use
Create Project Widget
Example Project Form Fields
Text
Name: "My Production App"
Tags: "production,web-app"
Description: "Production environment for our main web application"
🎯 Project Scope
The Project Scope determines which project you're currently working with. All operations are scoped to the selected project.
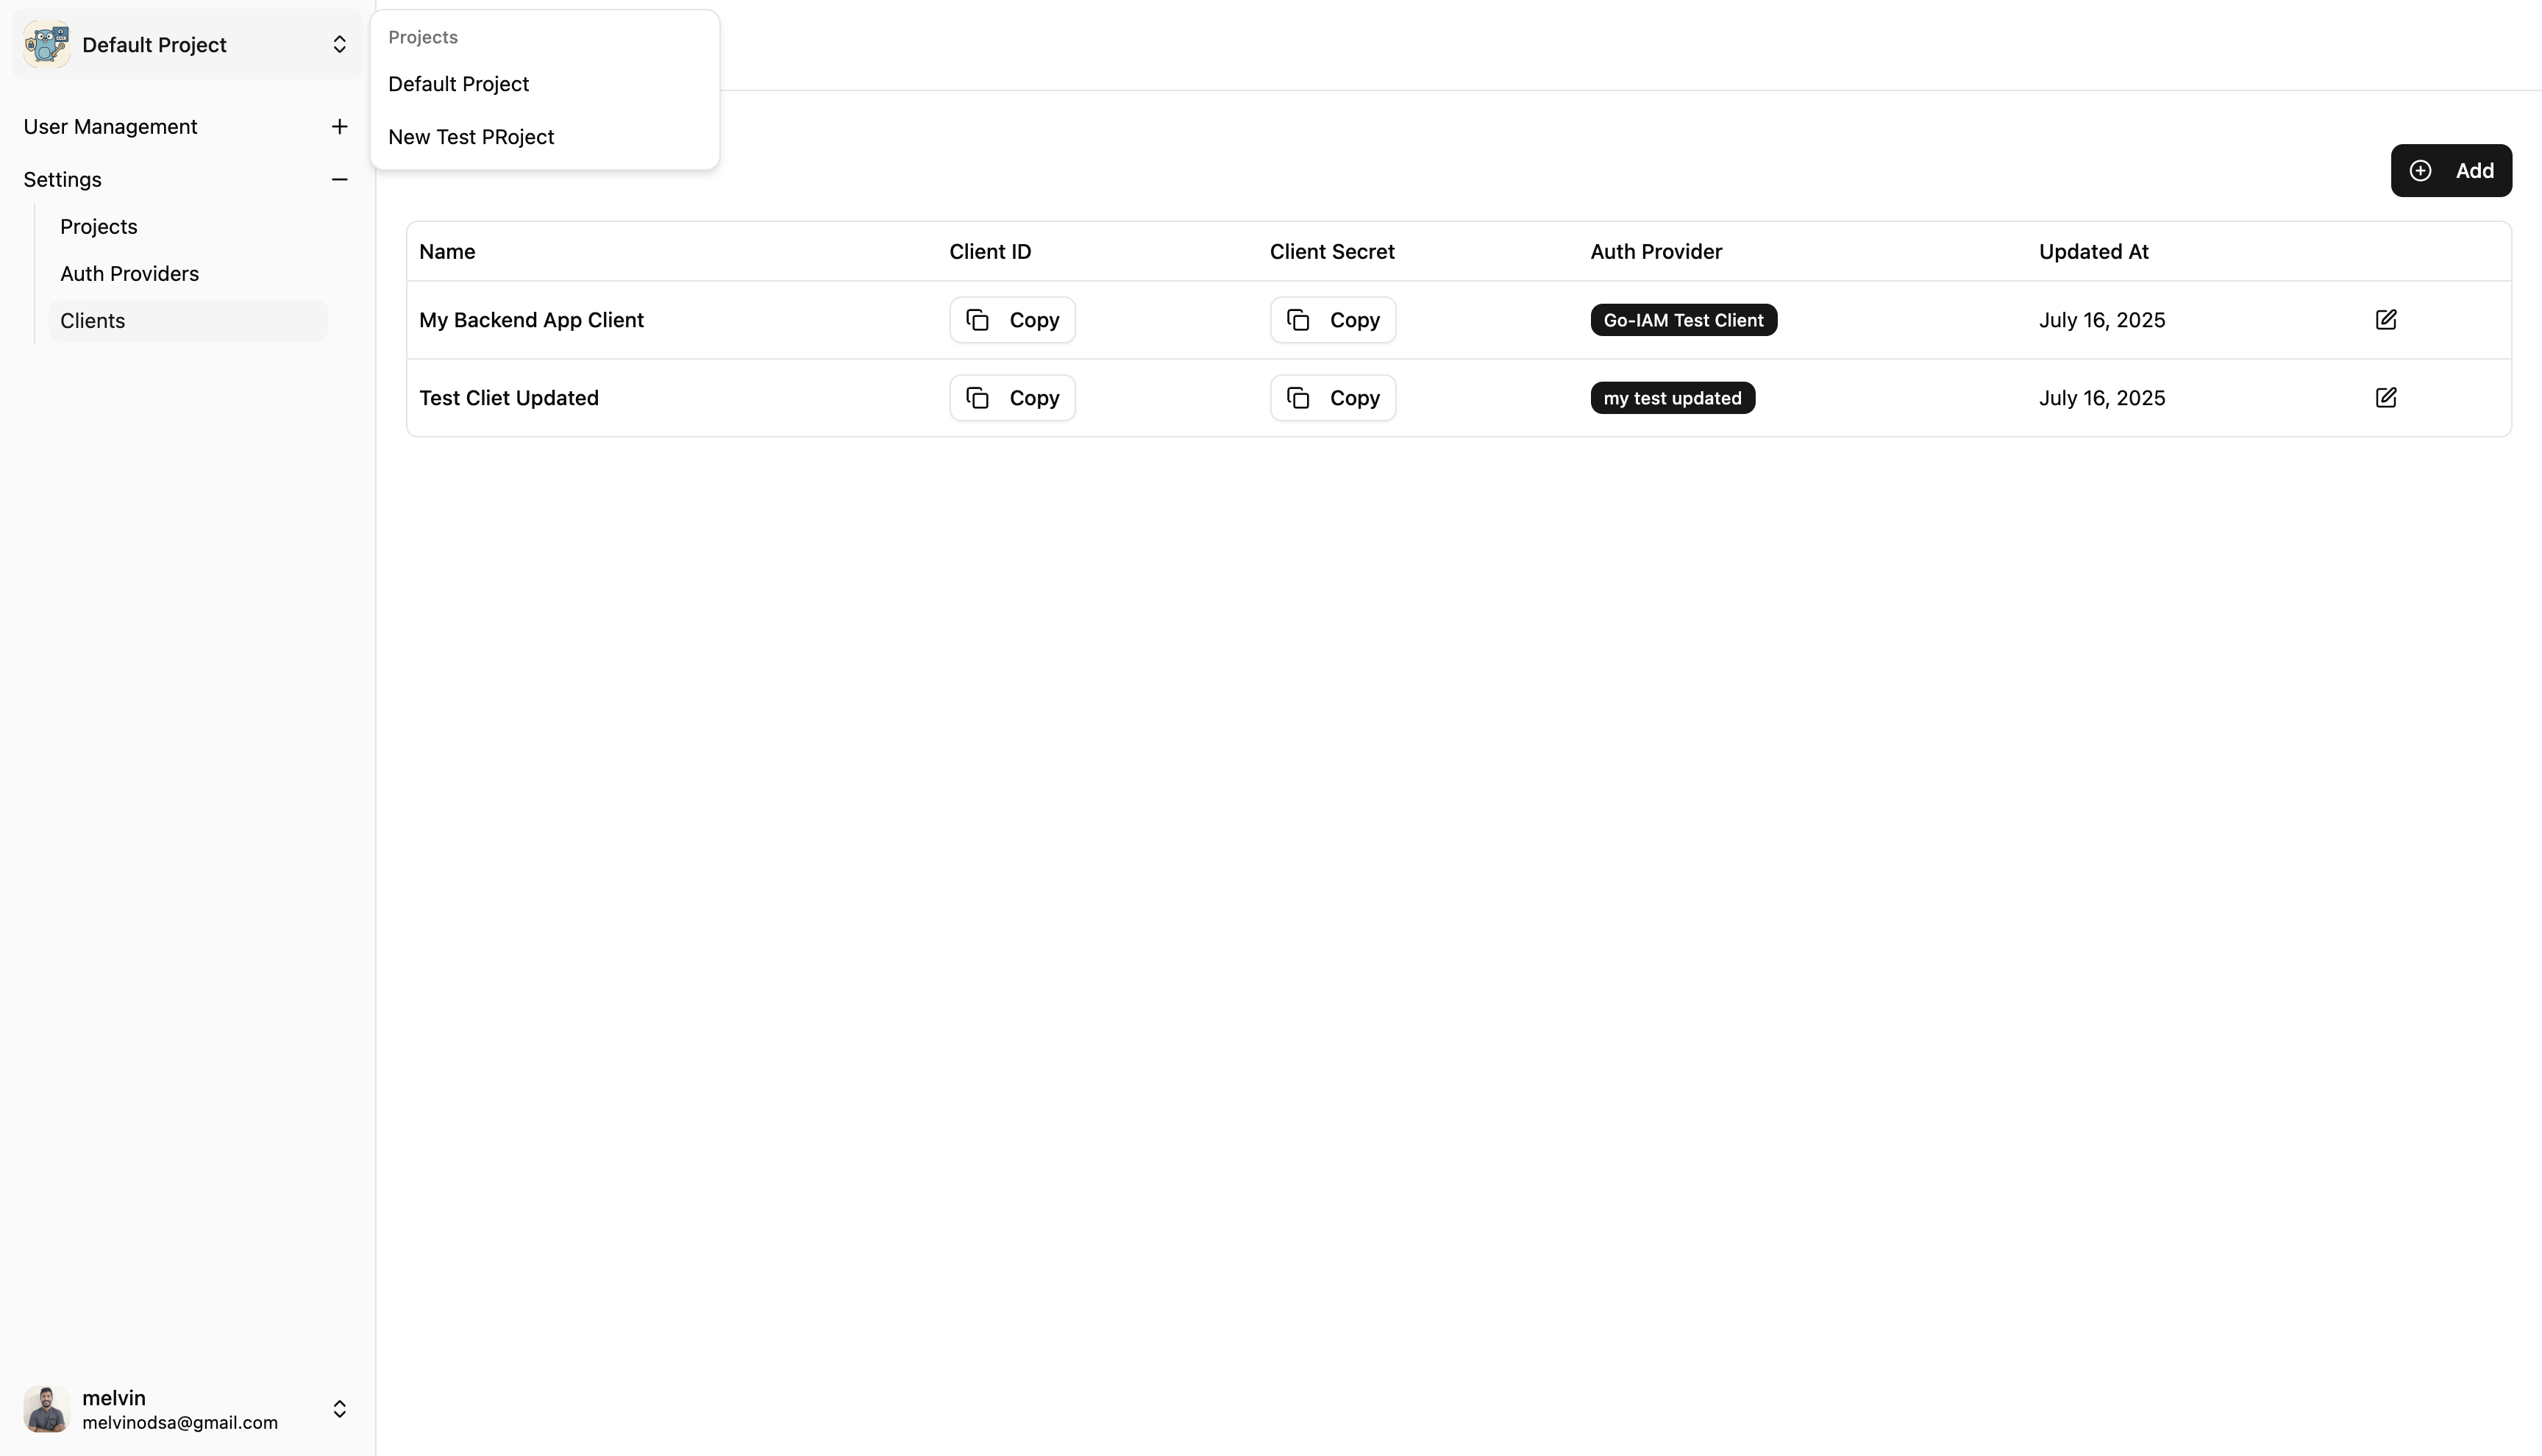
Switching Projects
📍 Location: Top-left corner of the navbar
Current Scope: Displays the currently selected project name
Project Dropdown: Click to see all available projects
Select Project: Choose the project you want to work with
Project Switcher in Navbar
Scoped Operations
When you select a project, the following are automatically scoped to that project:
Component
Description
Users
User accounts and profiles
Roles
Permission groups and access levels
Resources
Protected items and endpoints
Clients
Application configurations
Auth Providers
External authentication settings
⚠️ Important: Always verify you're in the correct project scope before making changes.
✏️ Updating Projects
Projects can be modified after creation (except for the Default Project).
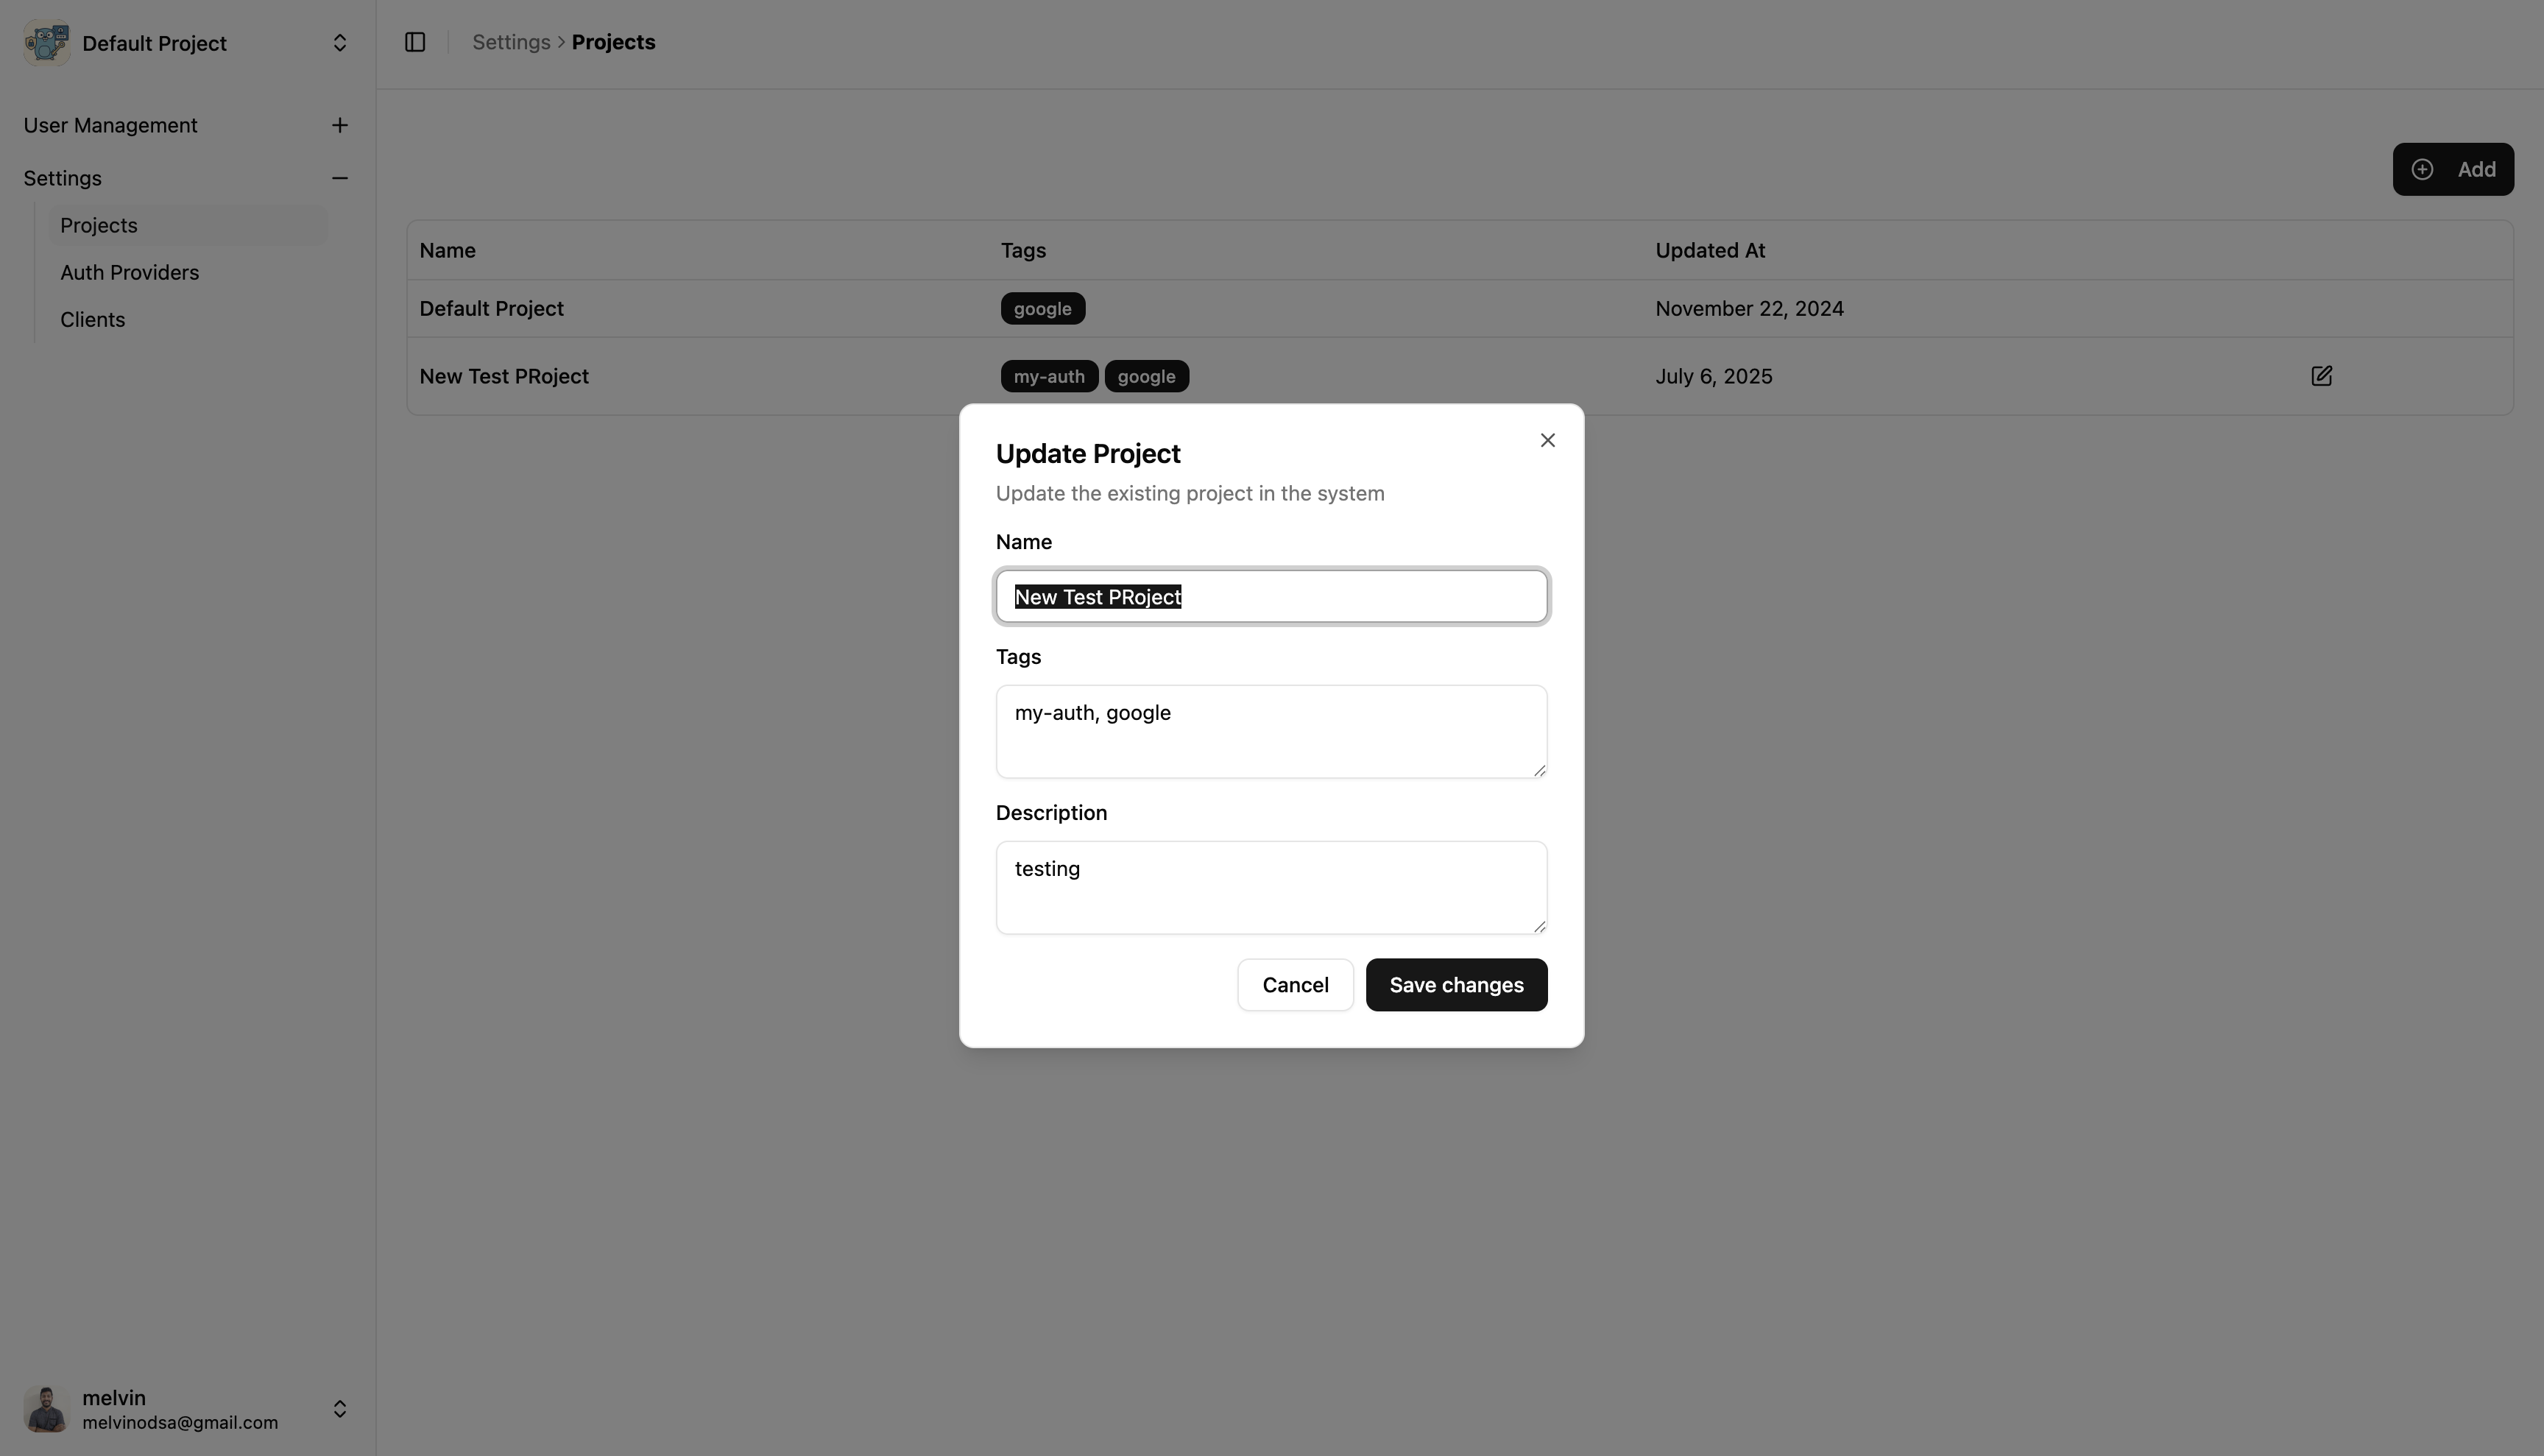
Update Process
Navigate to Projects
Go to Settings → Projects
Select Project to Edit
Find the project in the list
Click the Edit button on the right side
Note: Default Project cannot be edited
Modify Details
Update Name, Tags, or Description
Review your changes
Save Changes
Click Save Changes to apply updates
Update Project Widget
What Can Be Updated
Field
Editable
Notes
Name
✅ Yes
Display name for the project
Tags
✅ Yes
Categorization labels
Description
✅ Yes
Project details and purpose
Default Project
❌ No
System project cannot be modified
💡 Best Practices
Project Organization
One Project Per Environment - Separate dev, staging, production
Descriptive Naming - Clear project names and descriptions
Consistent Tagging - Use tags for categorization and filtering
This multi-tenant architecture ensures that your applications remain completely isolated while providing the flexibility to manage multiple environments and applications from a single Go IAM instance.
🔧 Client Configuration
After setting up your project, the next step is to configure a Client for your application.
Client Types
Go IAM supports both:
Frontend Applications - Single Page Apps, Mobile Apps
Backend Services - APIs, Microservices, Server Applications
Once you have clients configured, you can manage them through the admin interface.
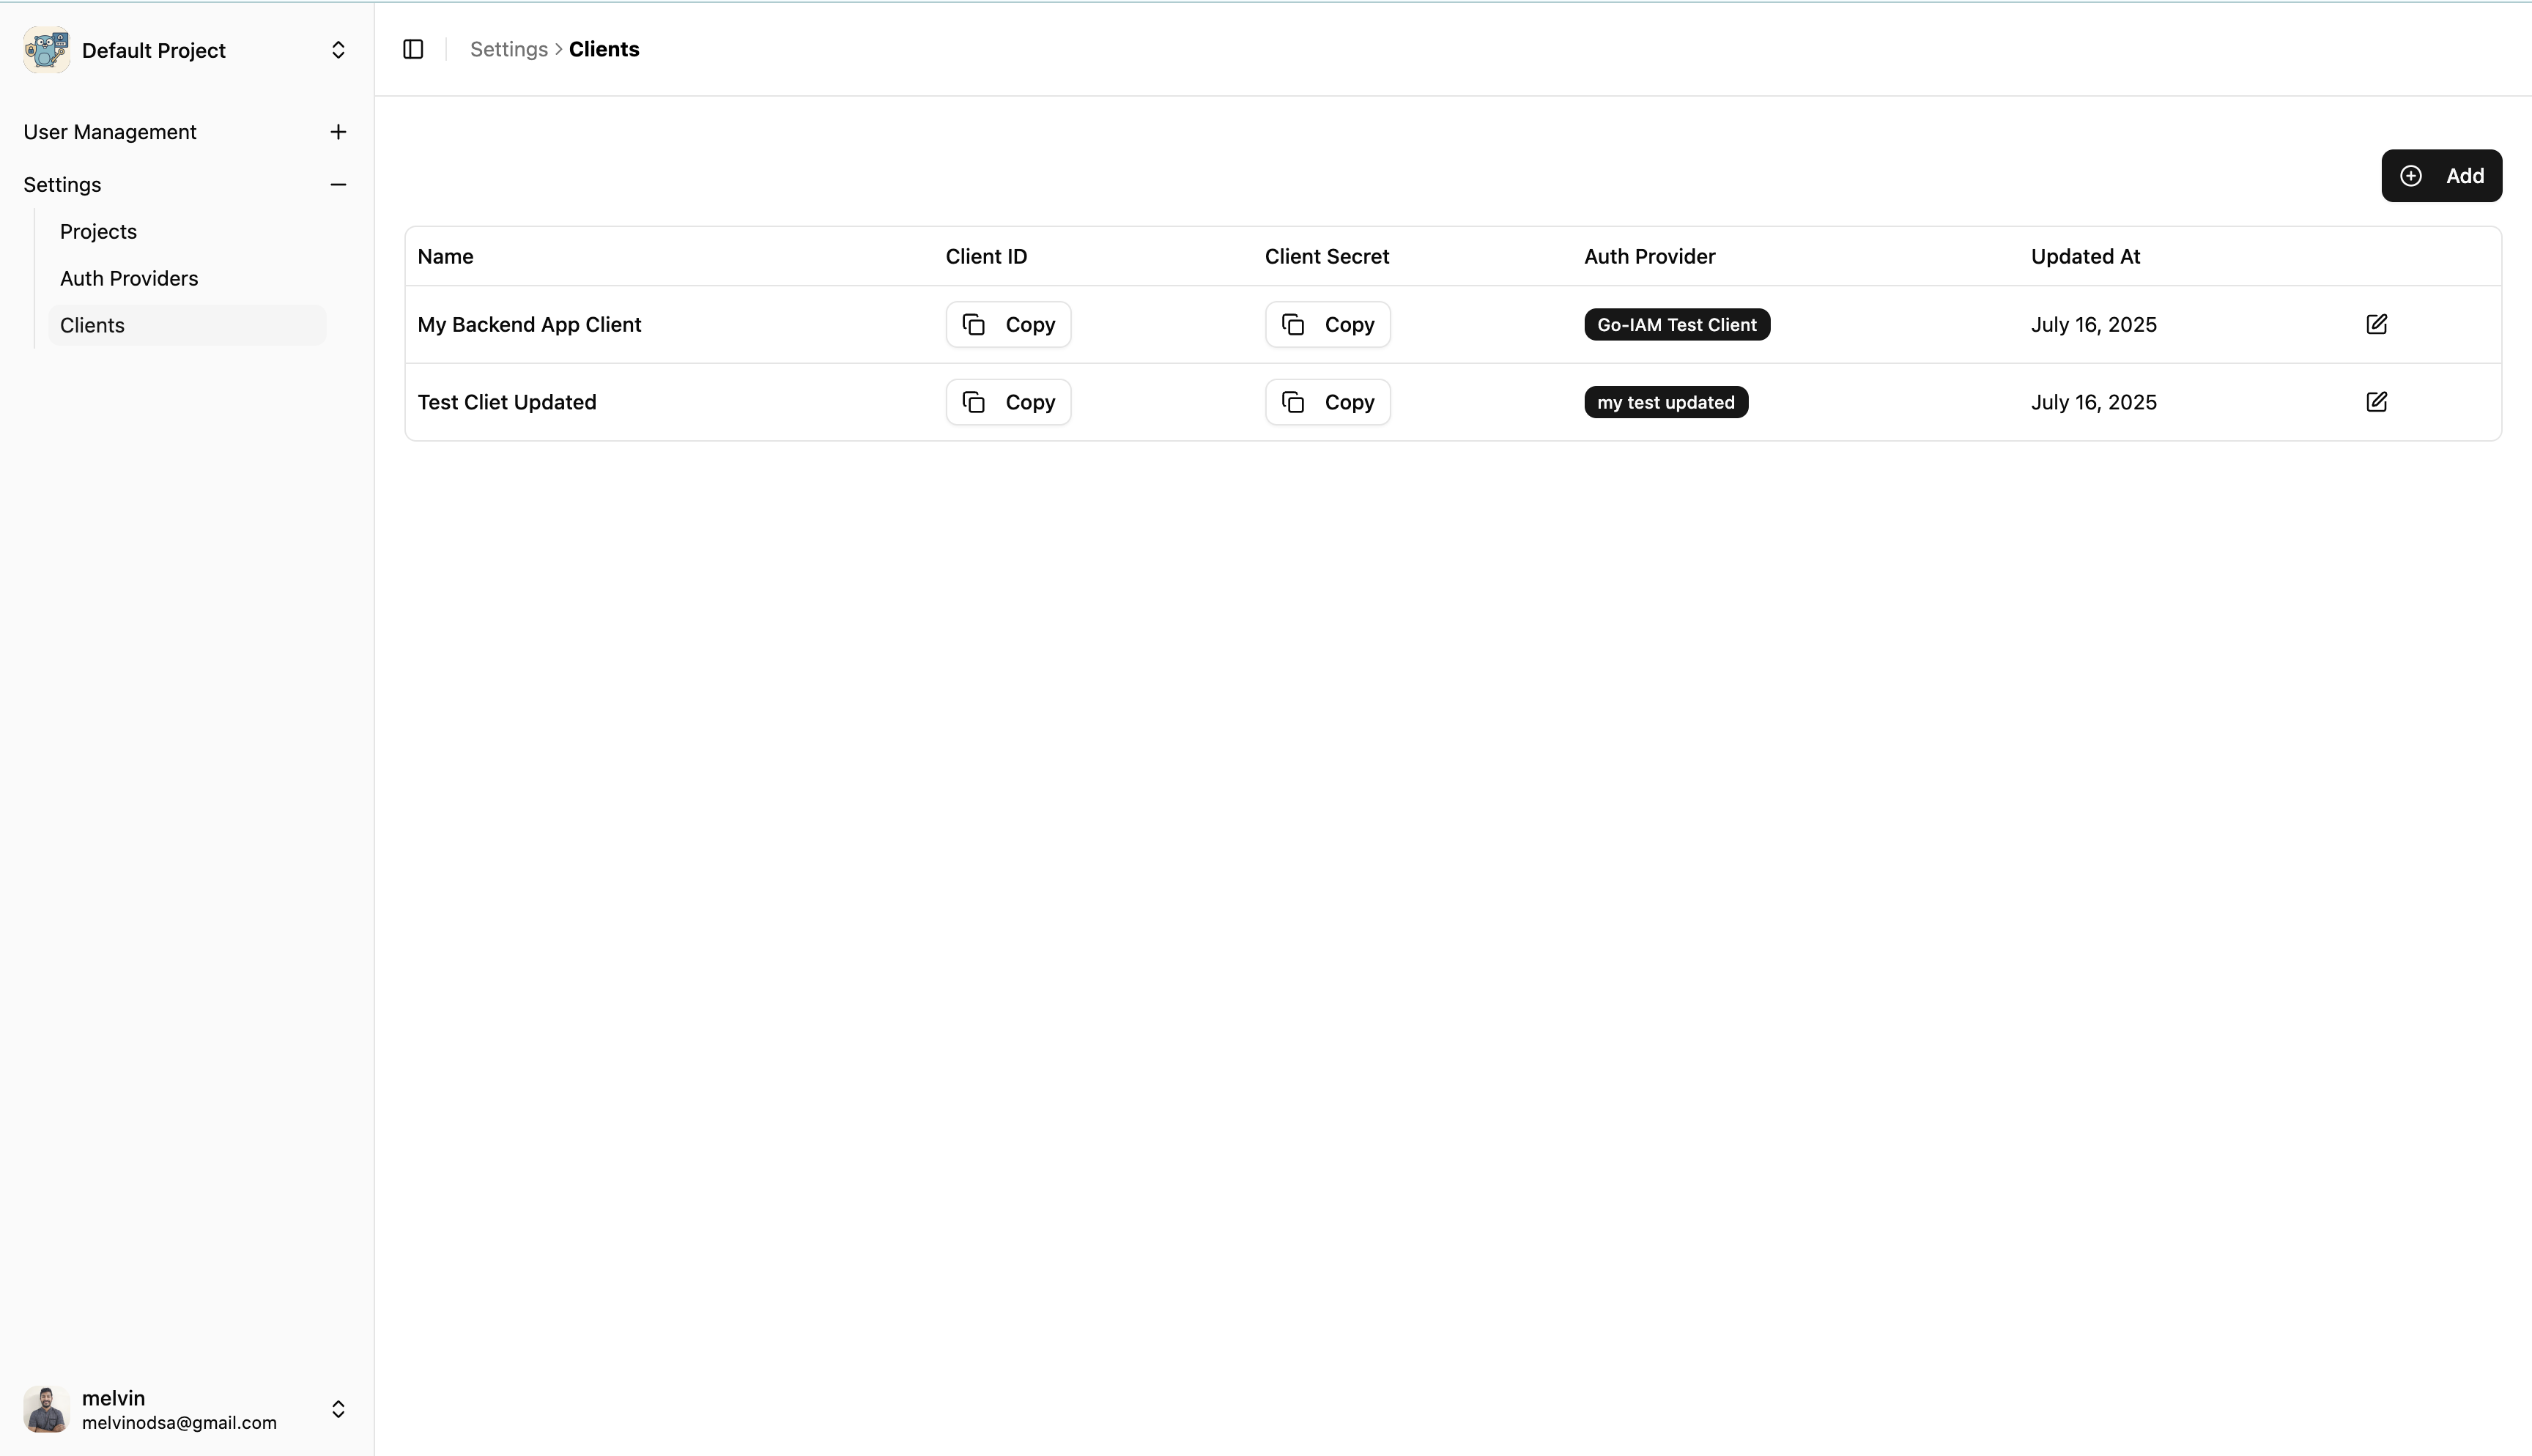
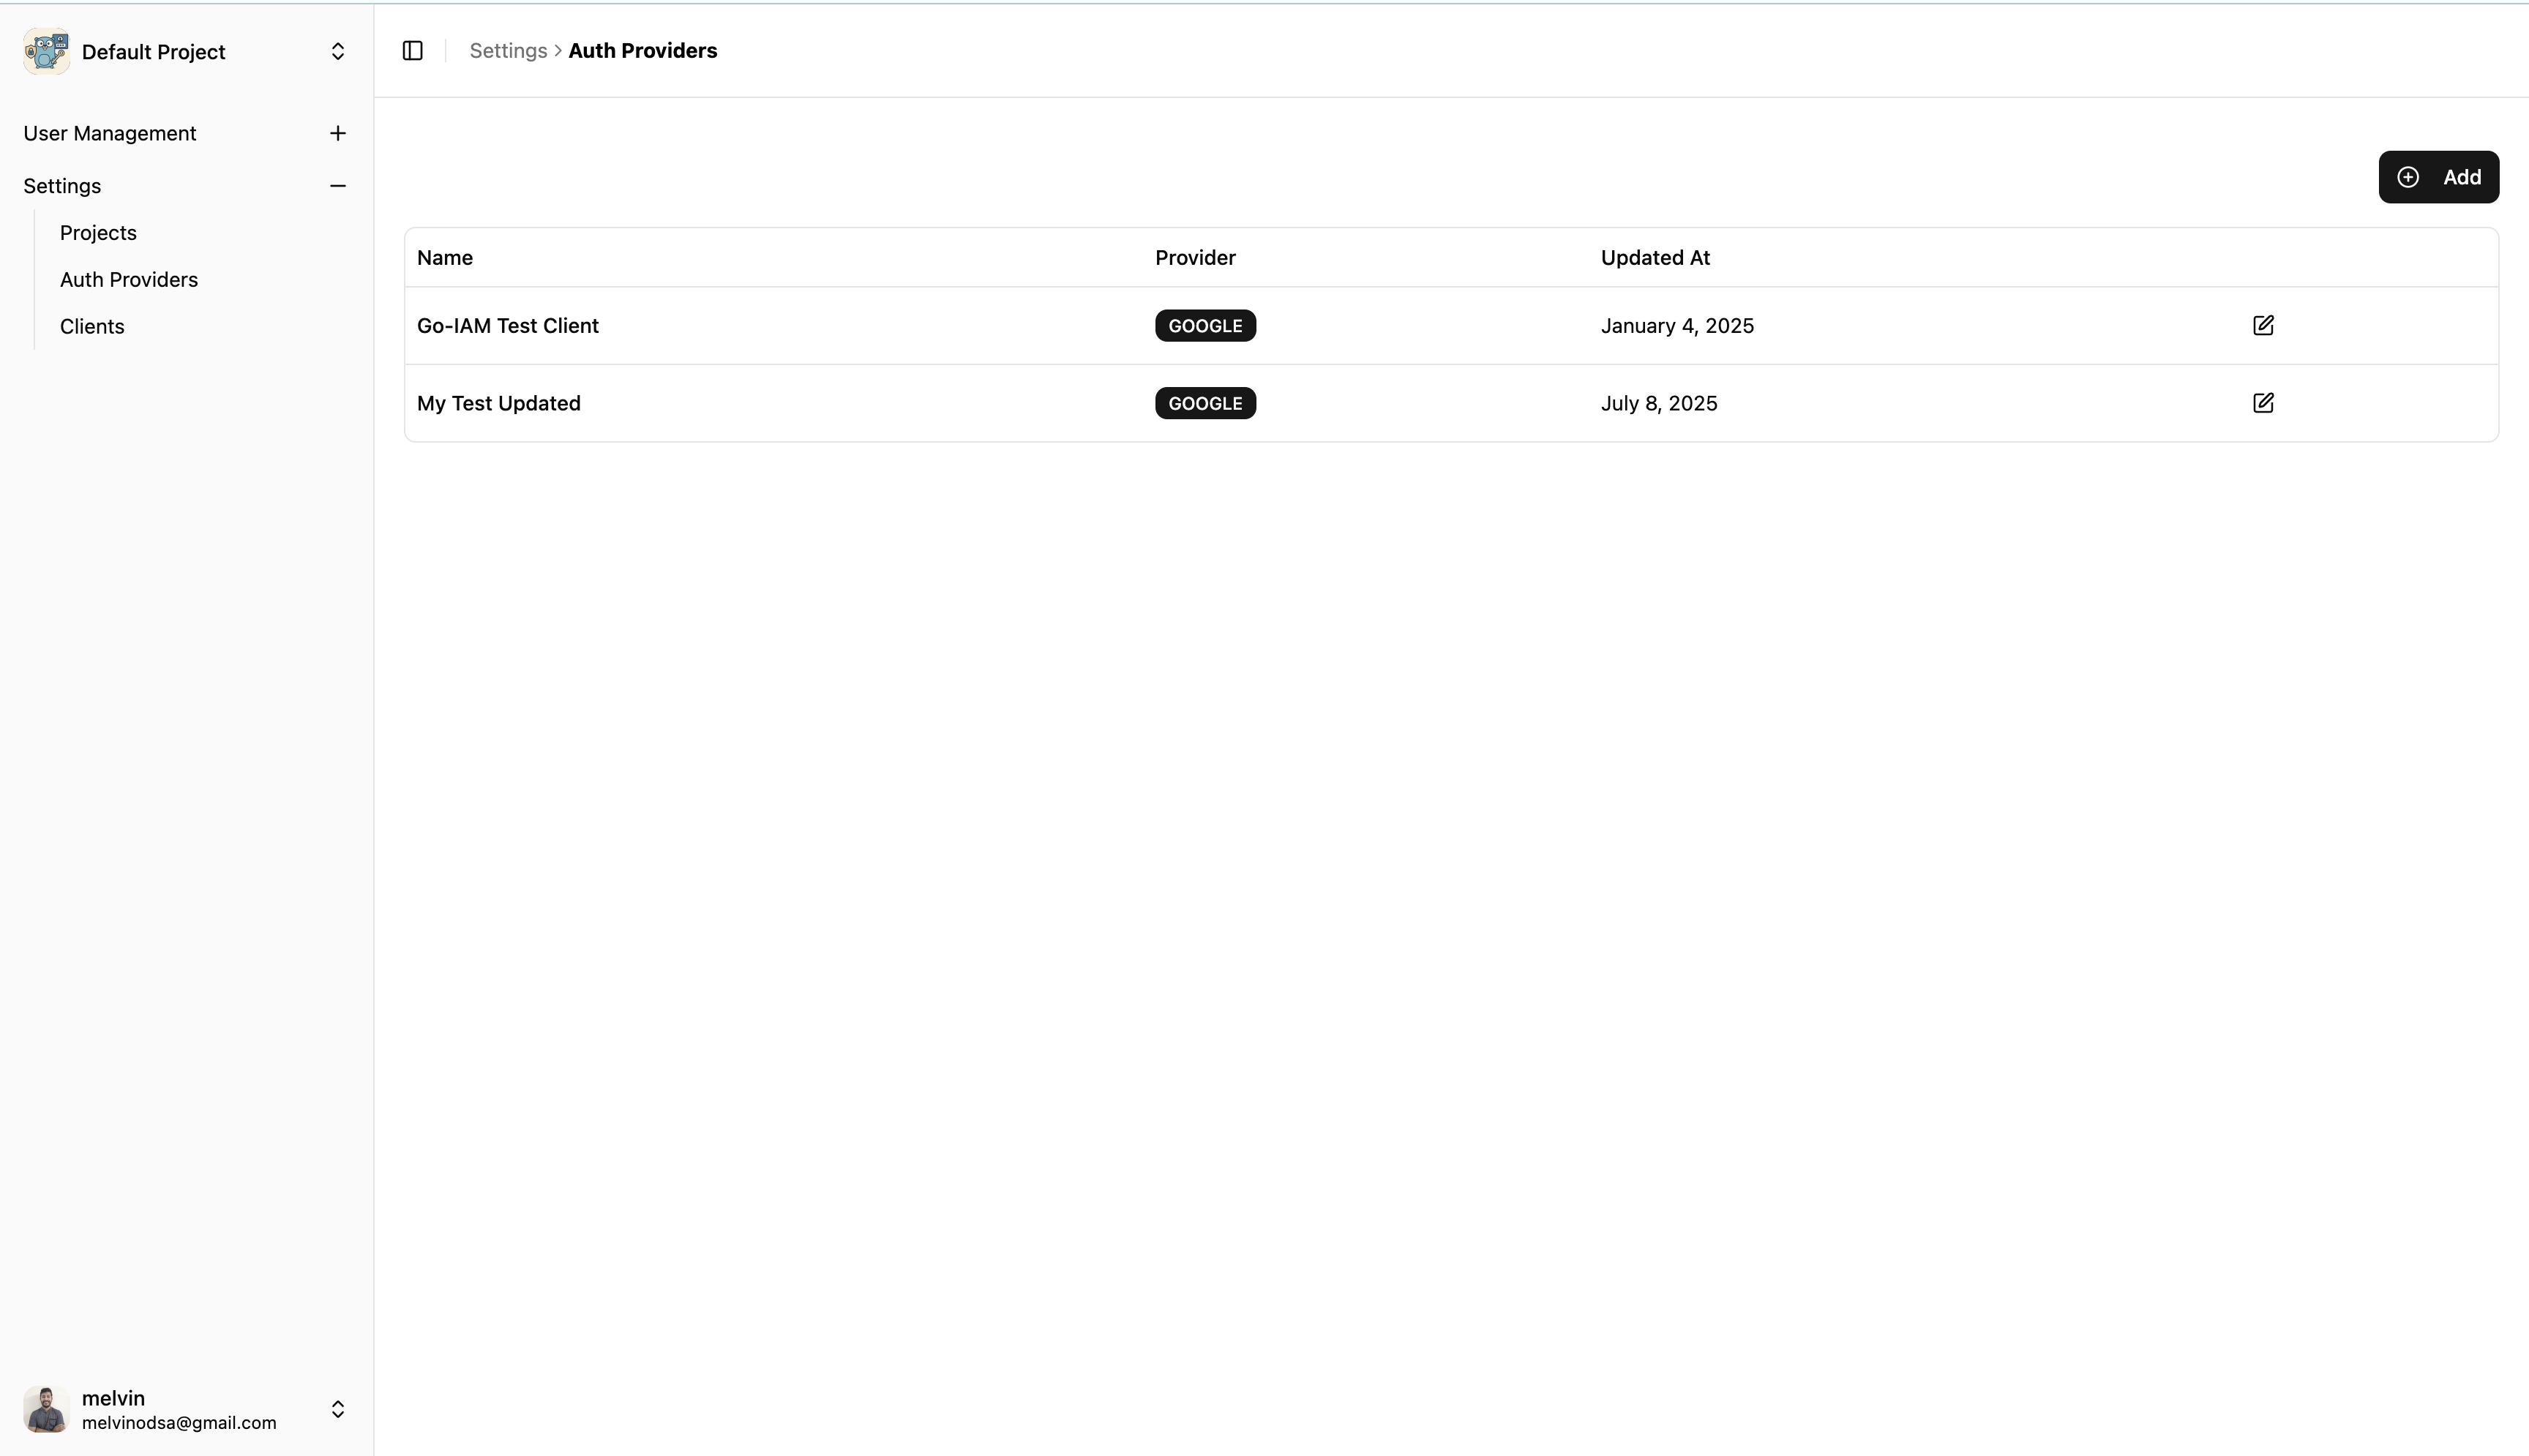
Accessing Client Management
Navigate to Clients
Go to Settings → Clients
View all clients in the current project scope
Client List Page
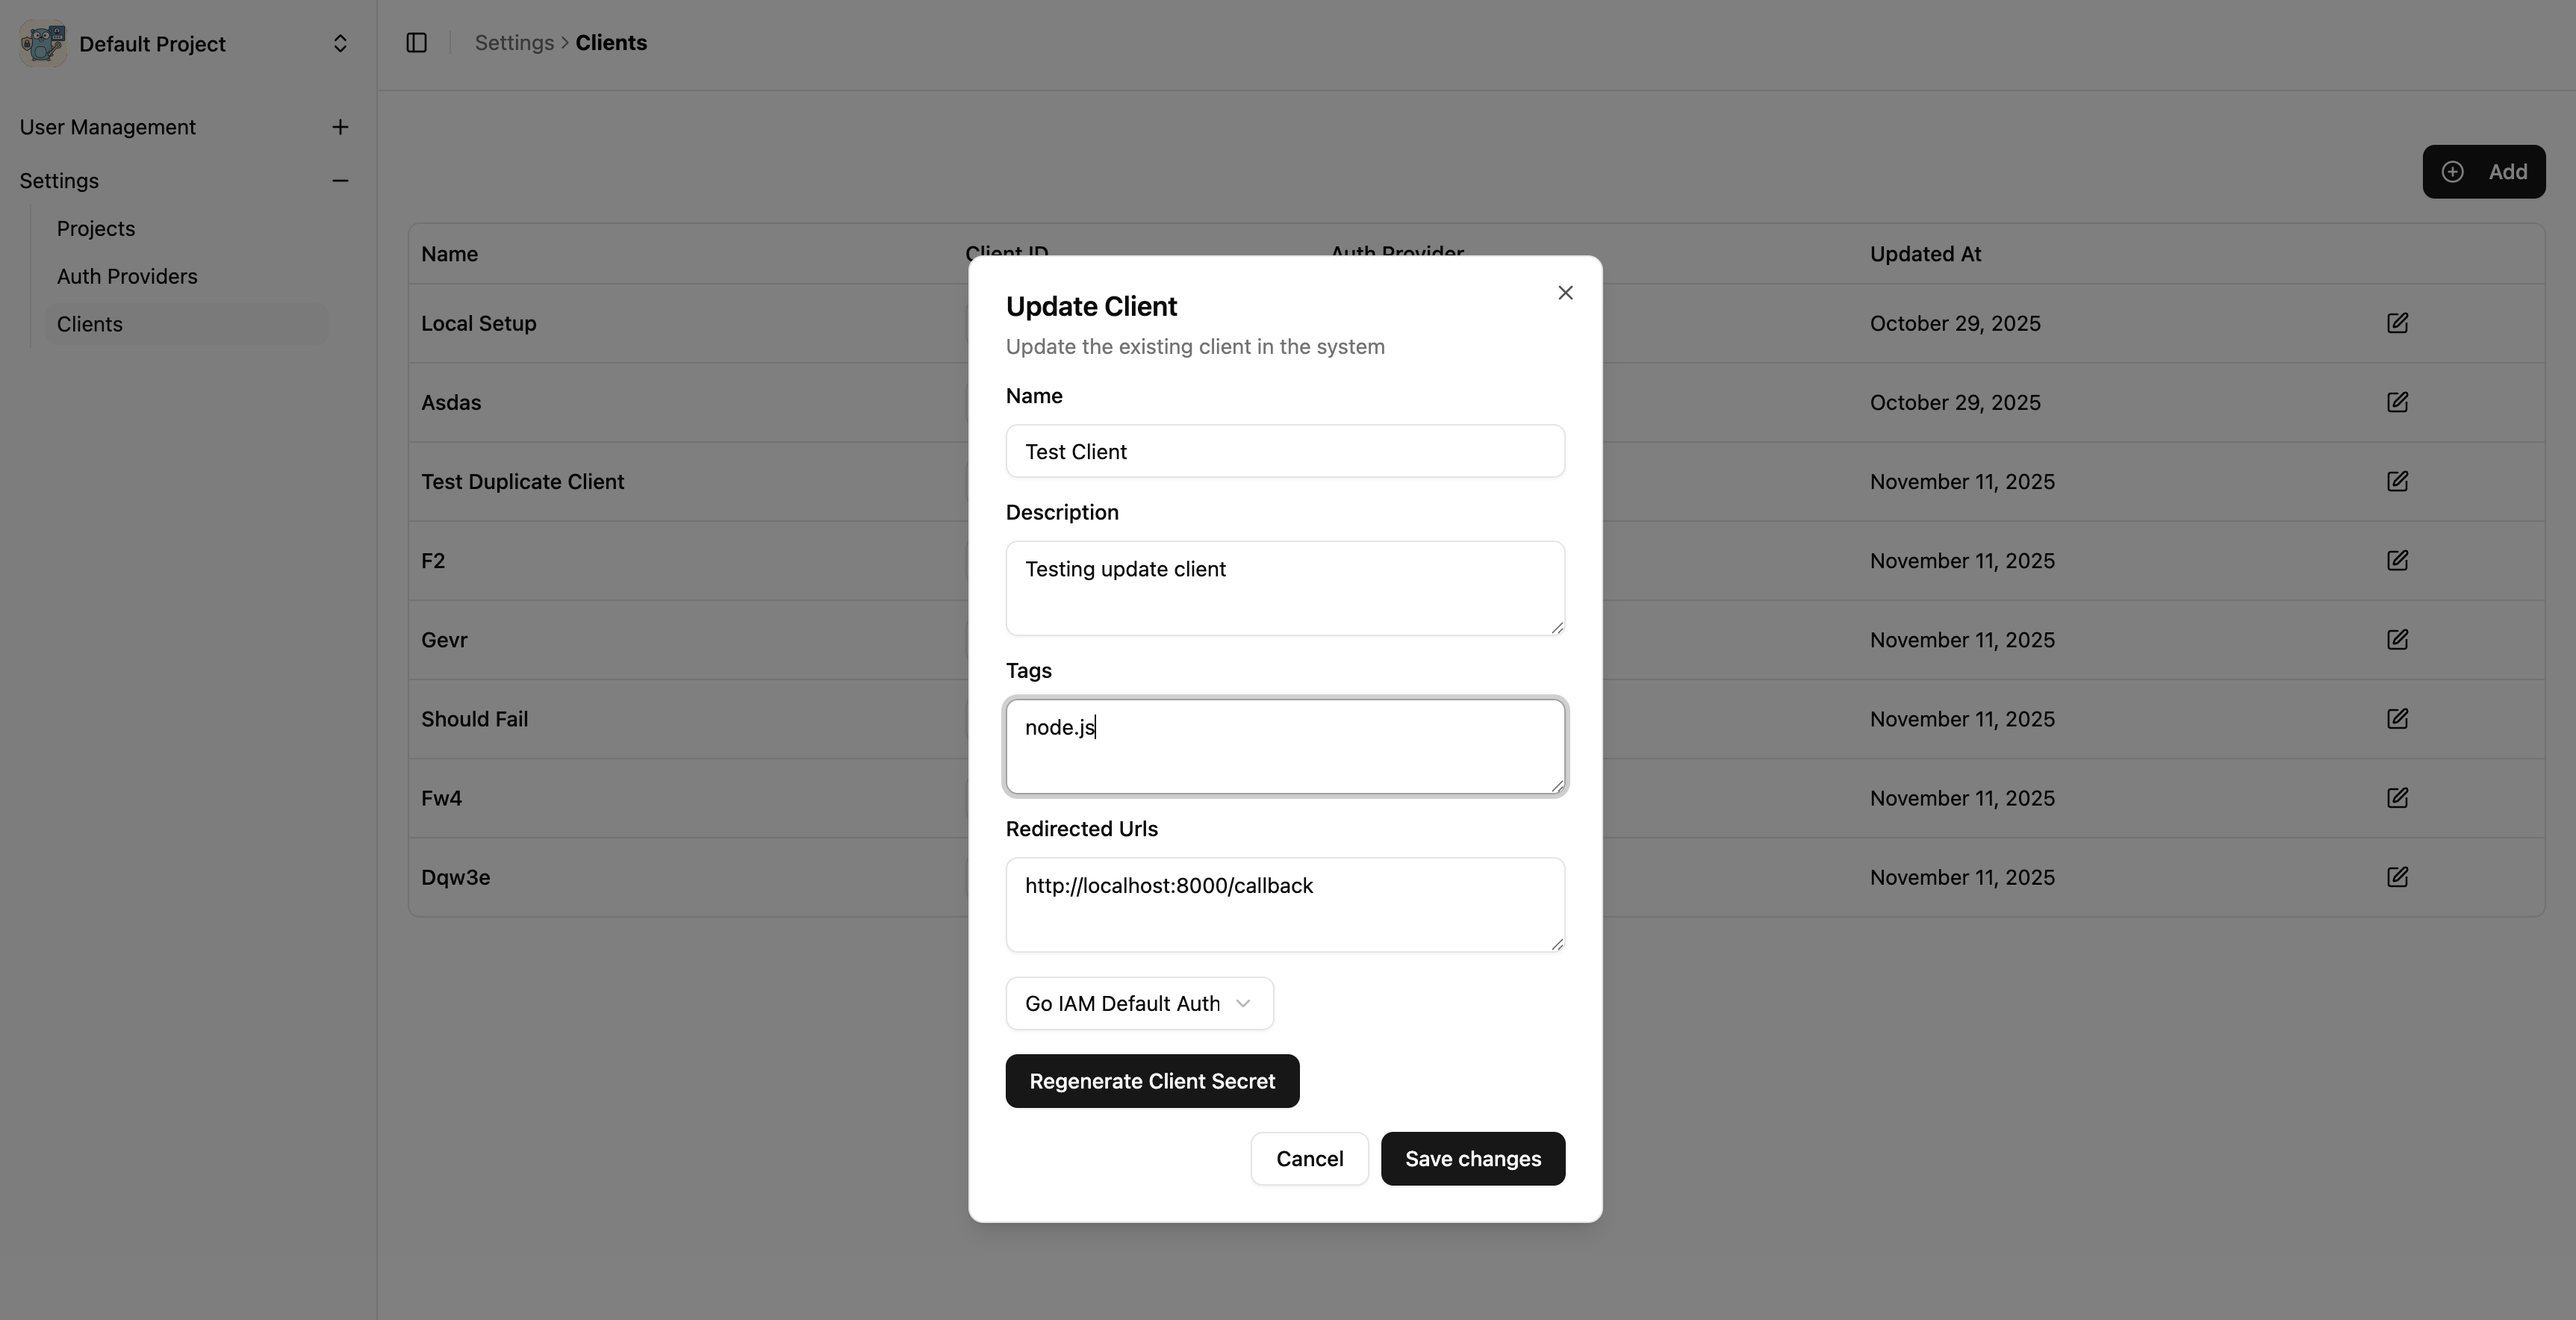
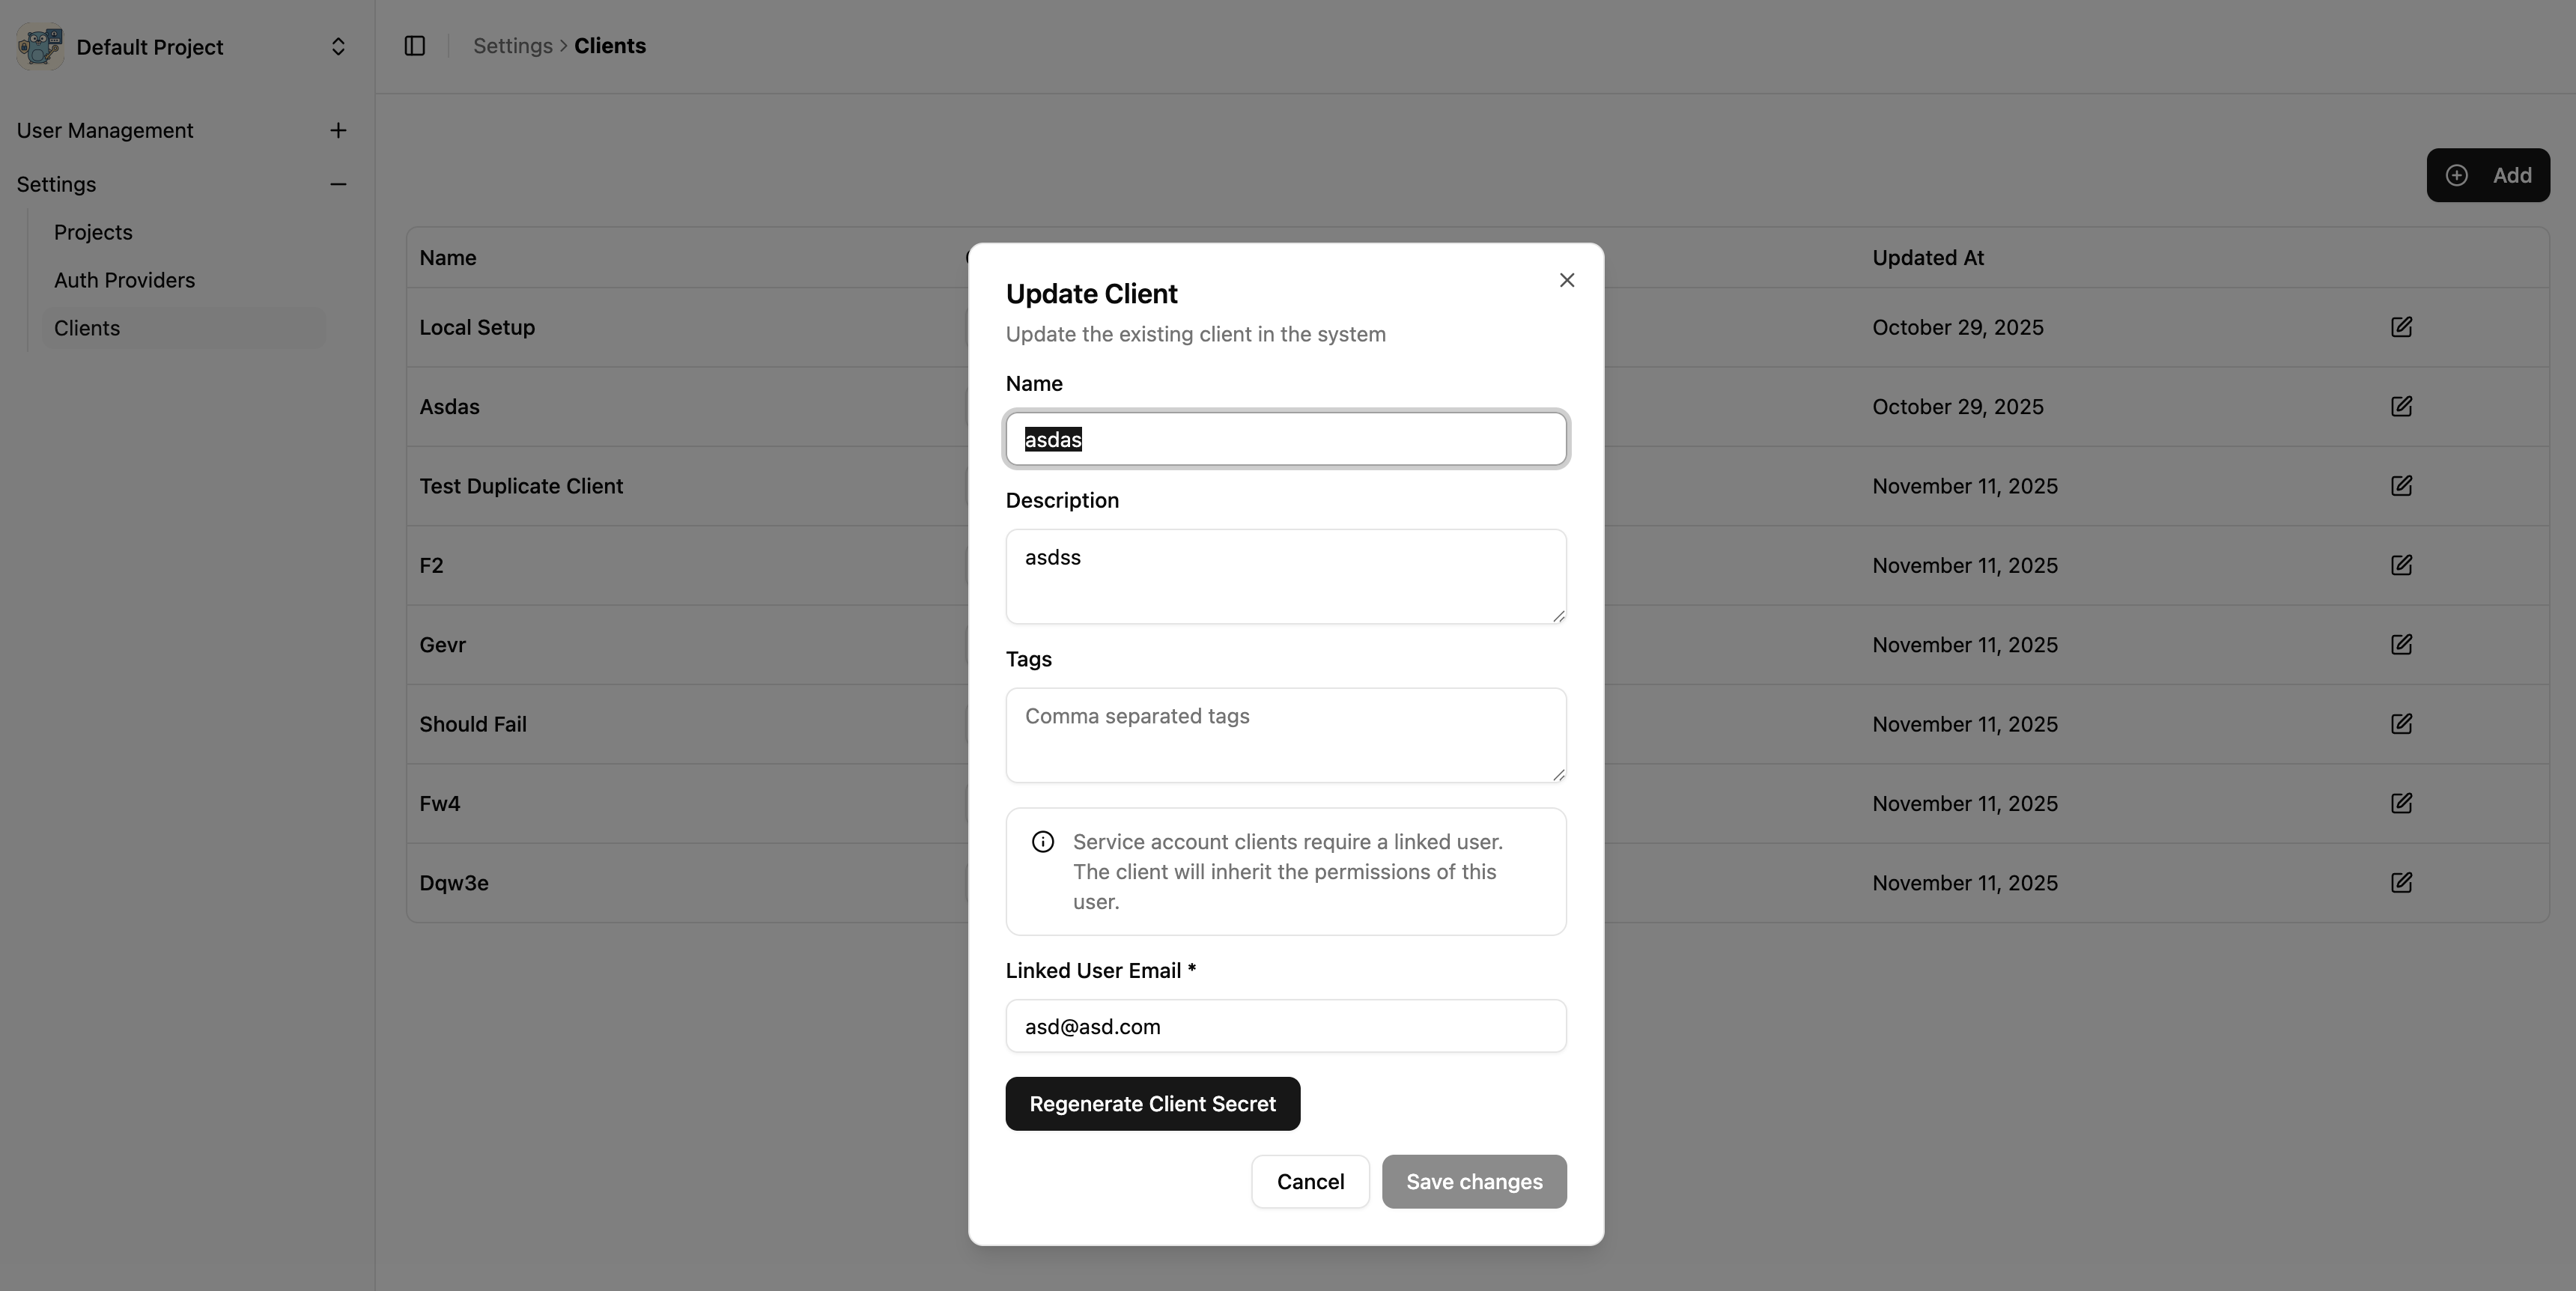
Update Client Configuration
Click the Edit button next to any client
Modify client settings as needed
Save your changes
Client Update with Auth Provider Widget
Client Update with Service Account Widget
Client Operations
Common client management tasks include:
Updating credentials - Rotate client secrets
Configuring redirects - Update callback URLs
Managing Auth providers - Change the auth provider linked to the client (only applicable for non service account based clients)
Auth Provider
If you have already setup an auth provider you can skip this. Currently the platform supports Google/Microsoft/GitHub any OpenID Connect Provider. Note that auth provider created under one project is not available to other projects. You can find Auth Providers page in Settings Menu.
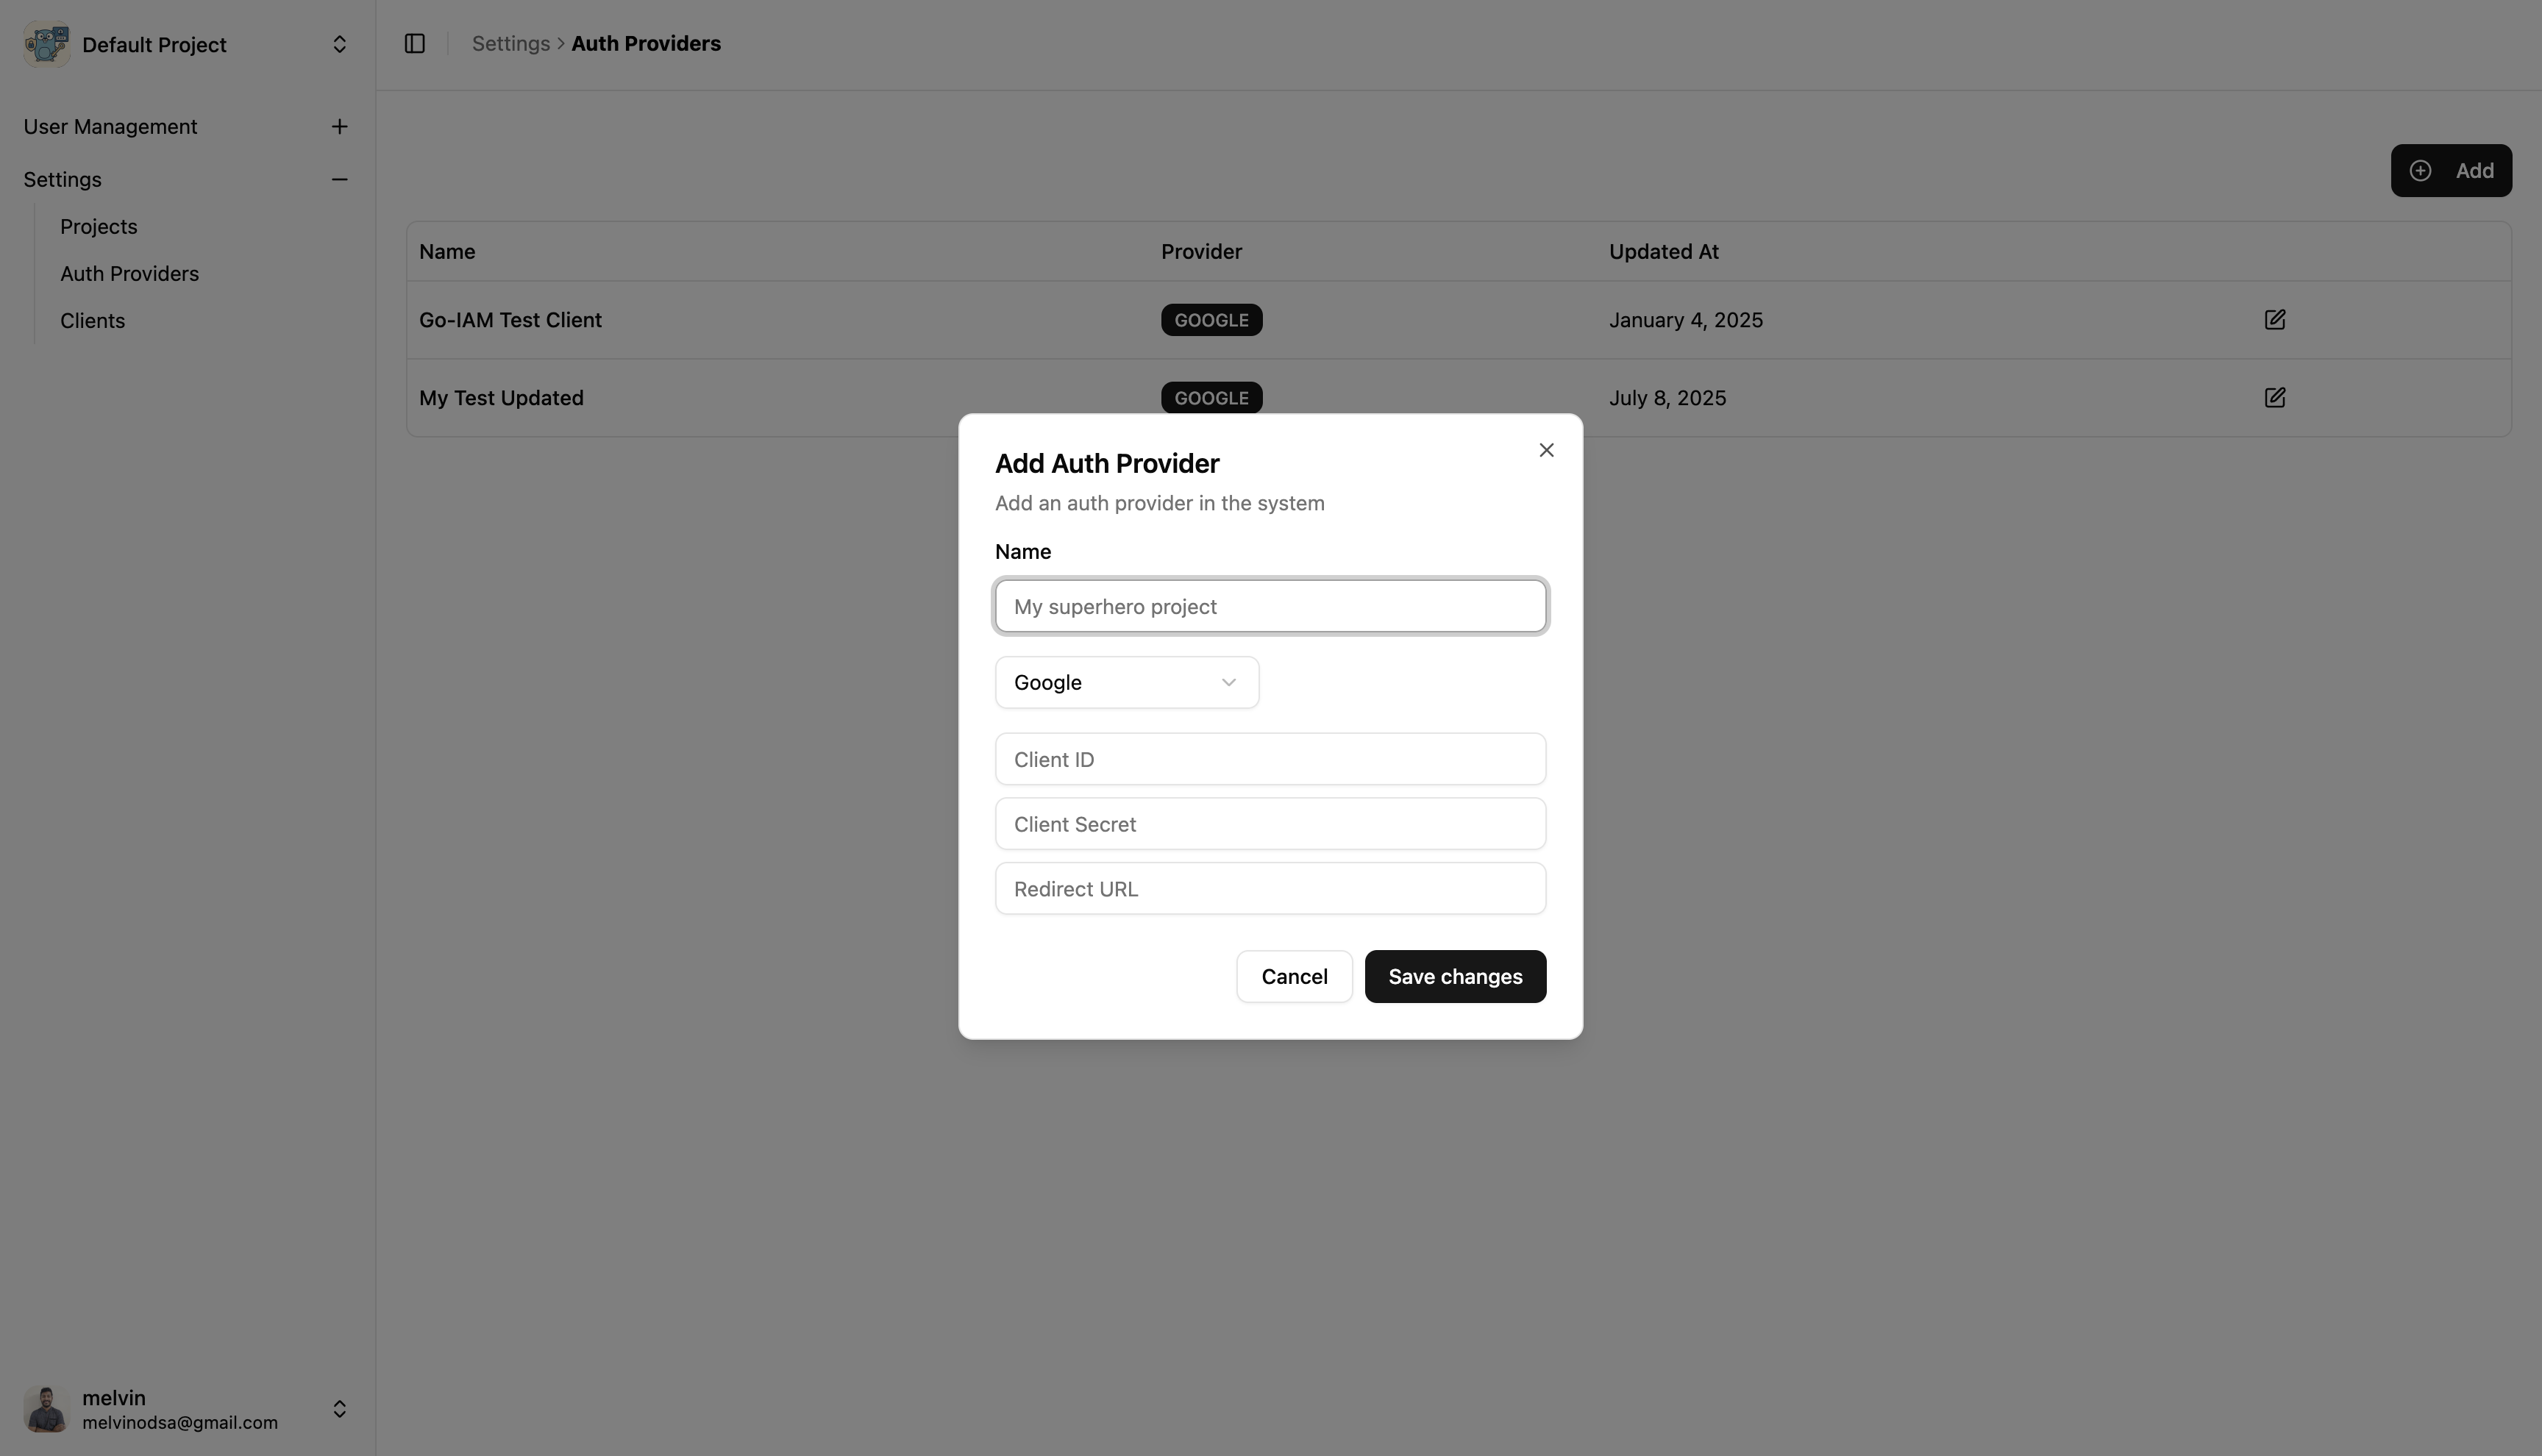
➕ Creating a New Auth Provider
Navigate to Auth Providers
Go to Settings → Auth Providers
Click on Add Button
List Auth Providers Page
Fill in the Auth Provider Details
Name: Descriptive name for the auth provider
Type: Select the type of auth provider (Google, Microsoft, GitHub, OIDC)
Client ID and Client Secret: Obtain these from the respective auth provider's developer console
Save Auth Provider
Click Save Changes button
Create Auth Provider Widget
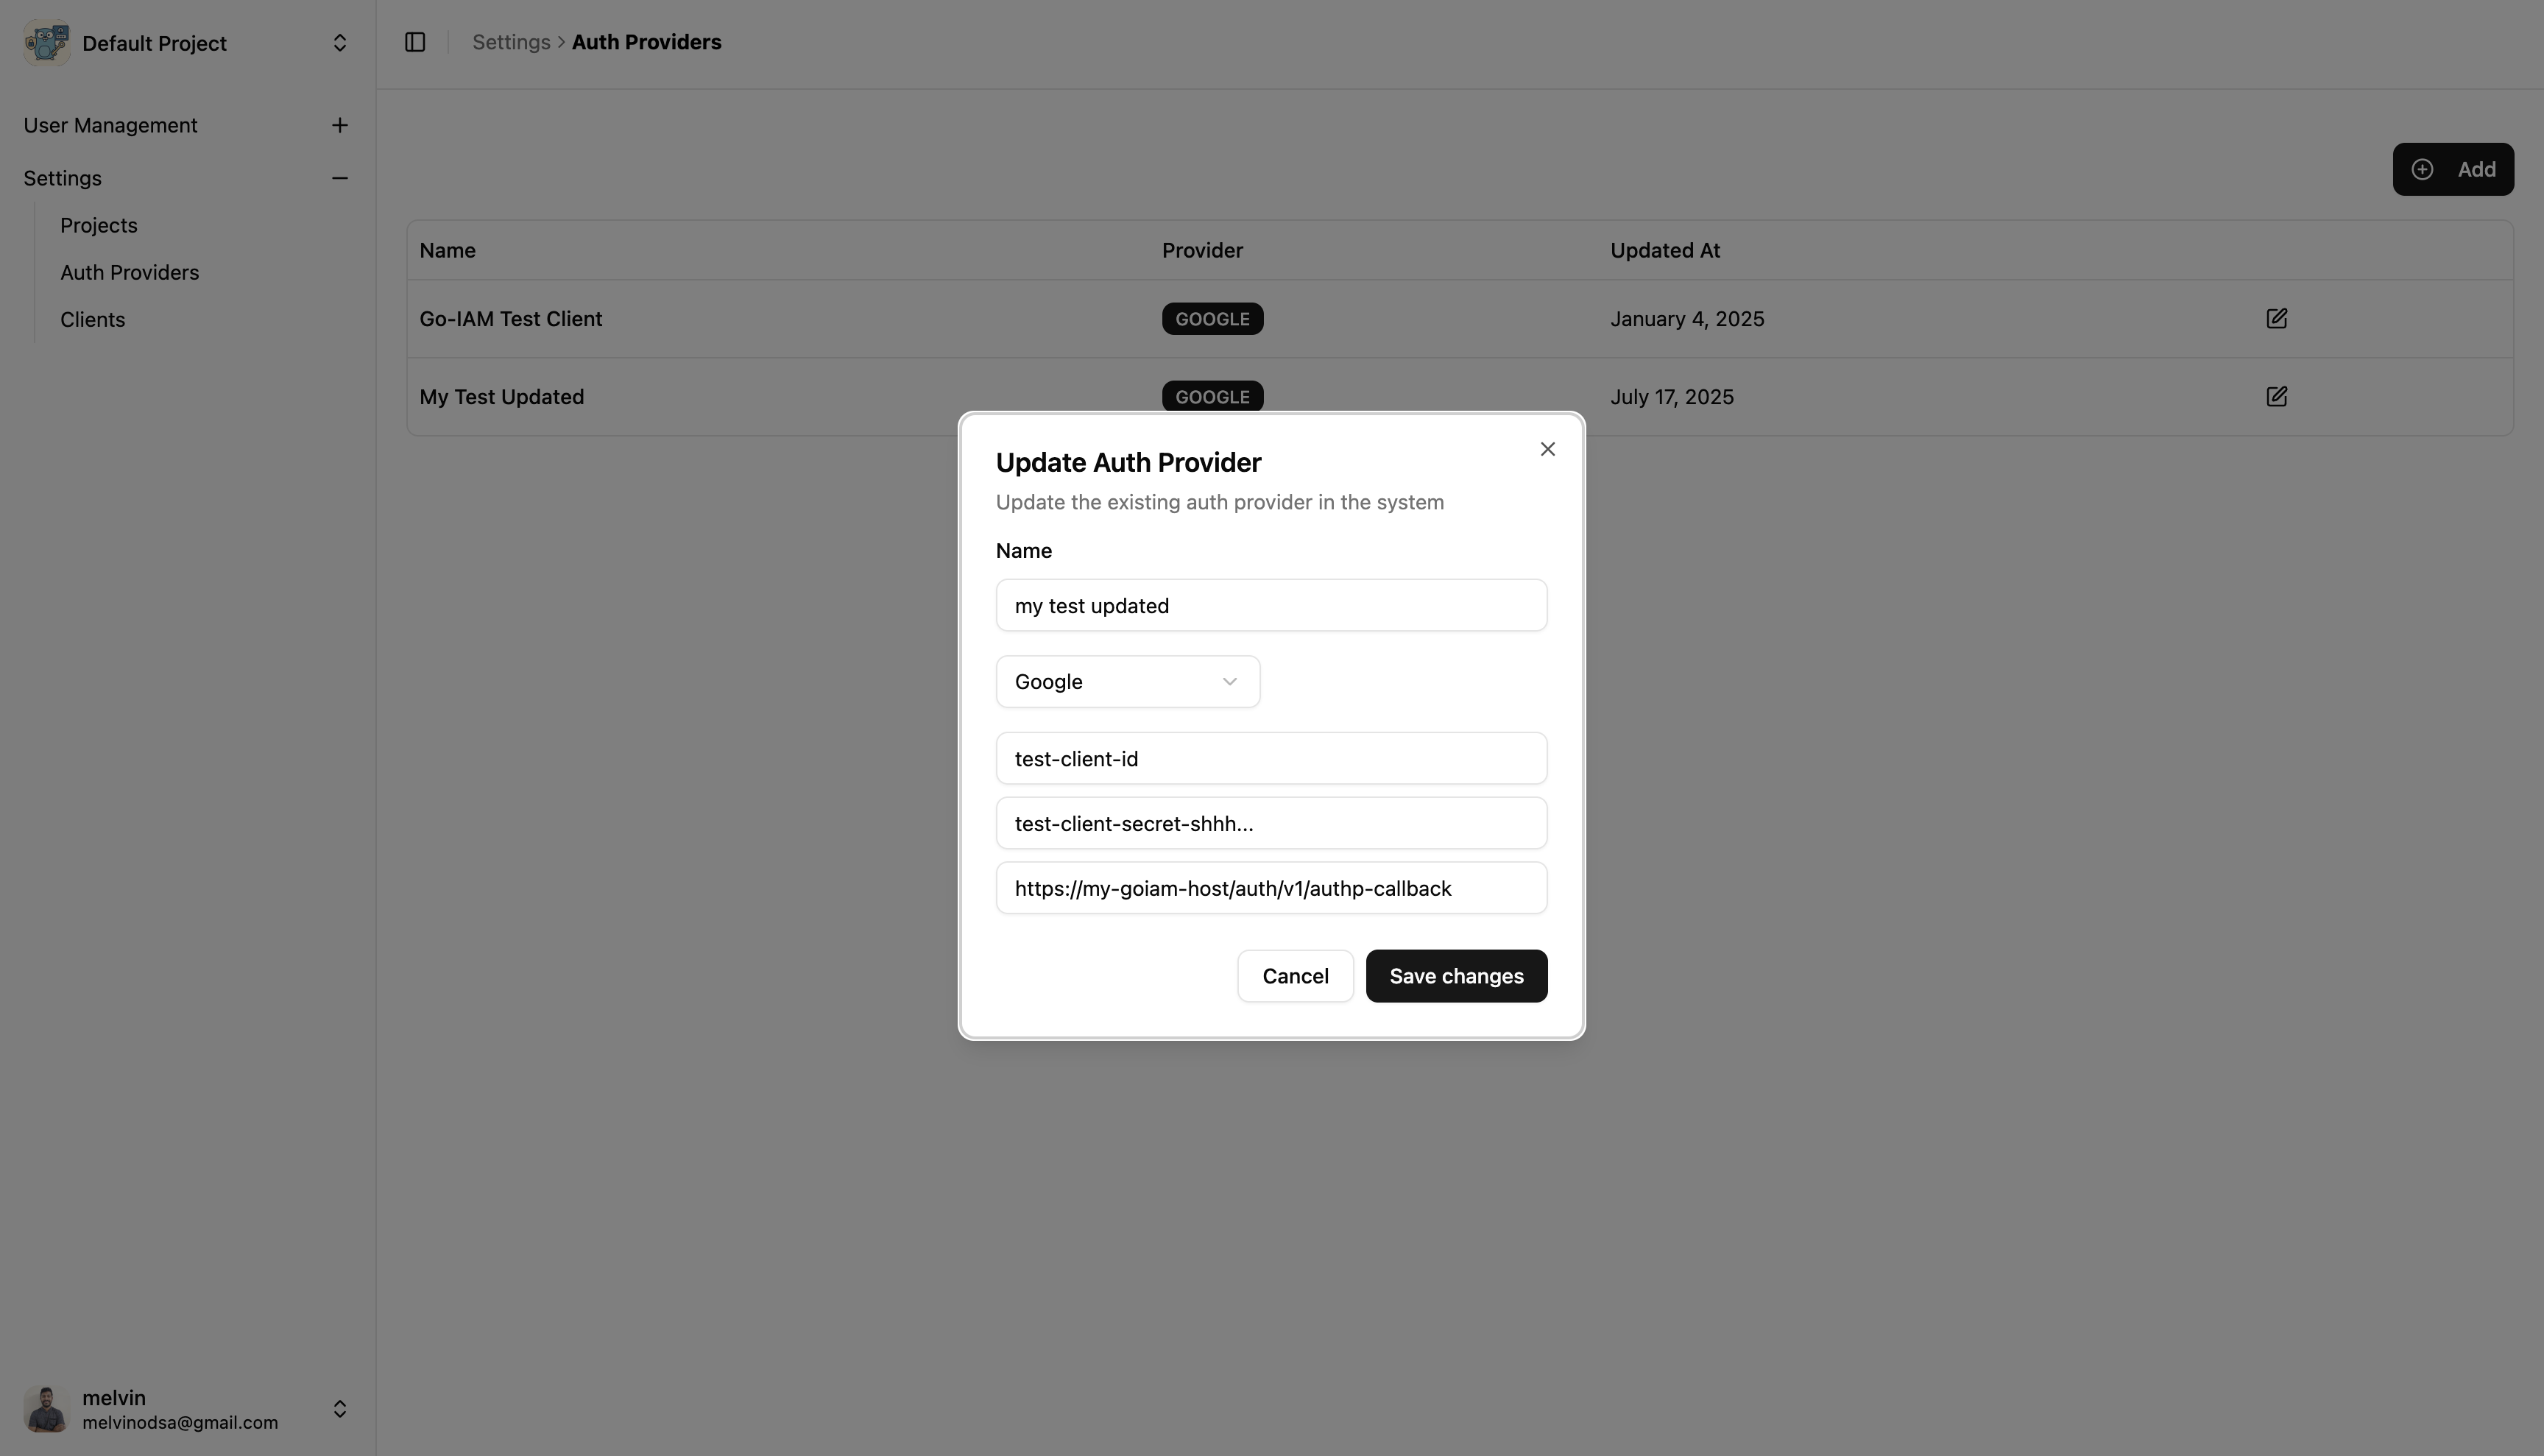
🔄 Updating Auth Provider
To update an existing auth provider, follow these steps:
Navigate to Auth Providers
Go to Settings → Auth Providers
Select Auth Provider to Edit
Find the auth provider in the list
Click the Edit button on the right side
Modify Details
Update Name, Client ID, or Client Secret or Callback URL
Save Changes
Click Save Changes to apply updates
Update Auth Provider Widget
Using Go IAM
Once the setup is done, you can start using Go IAM by creating resources, roles, and users within your project. Refer to the following guides for detailed instructions on each component:
Resources - Anything that needs access control should be defined as a resource
Roles - Define permissions and assign them to users
Users - Manage user accounts, their access rights, policies
API documentation is also available for programmatic access to all Go IAM features. Also SDKs for various programming languages are provided to simplify integration.
Resources
Resources represent any entity that requires access control within your application. This could be APIs, services, or specific data objects. We will see how to confgure this through the dashboard.
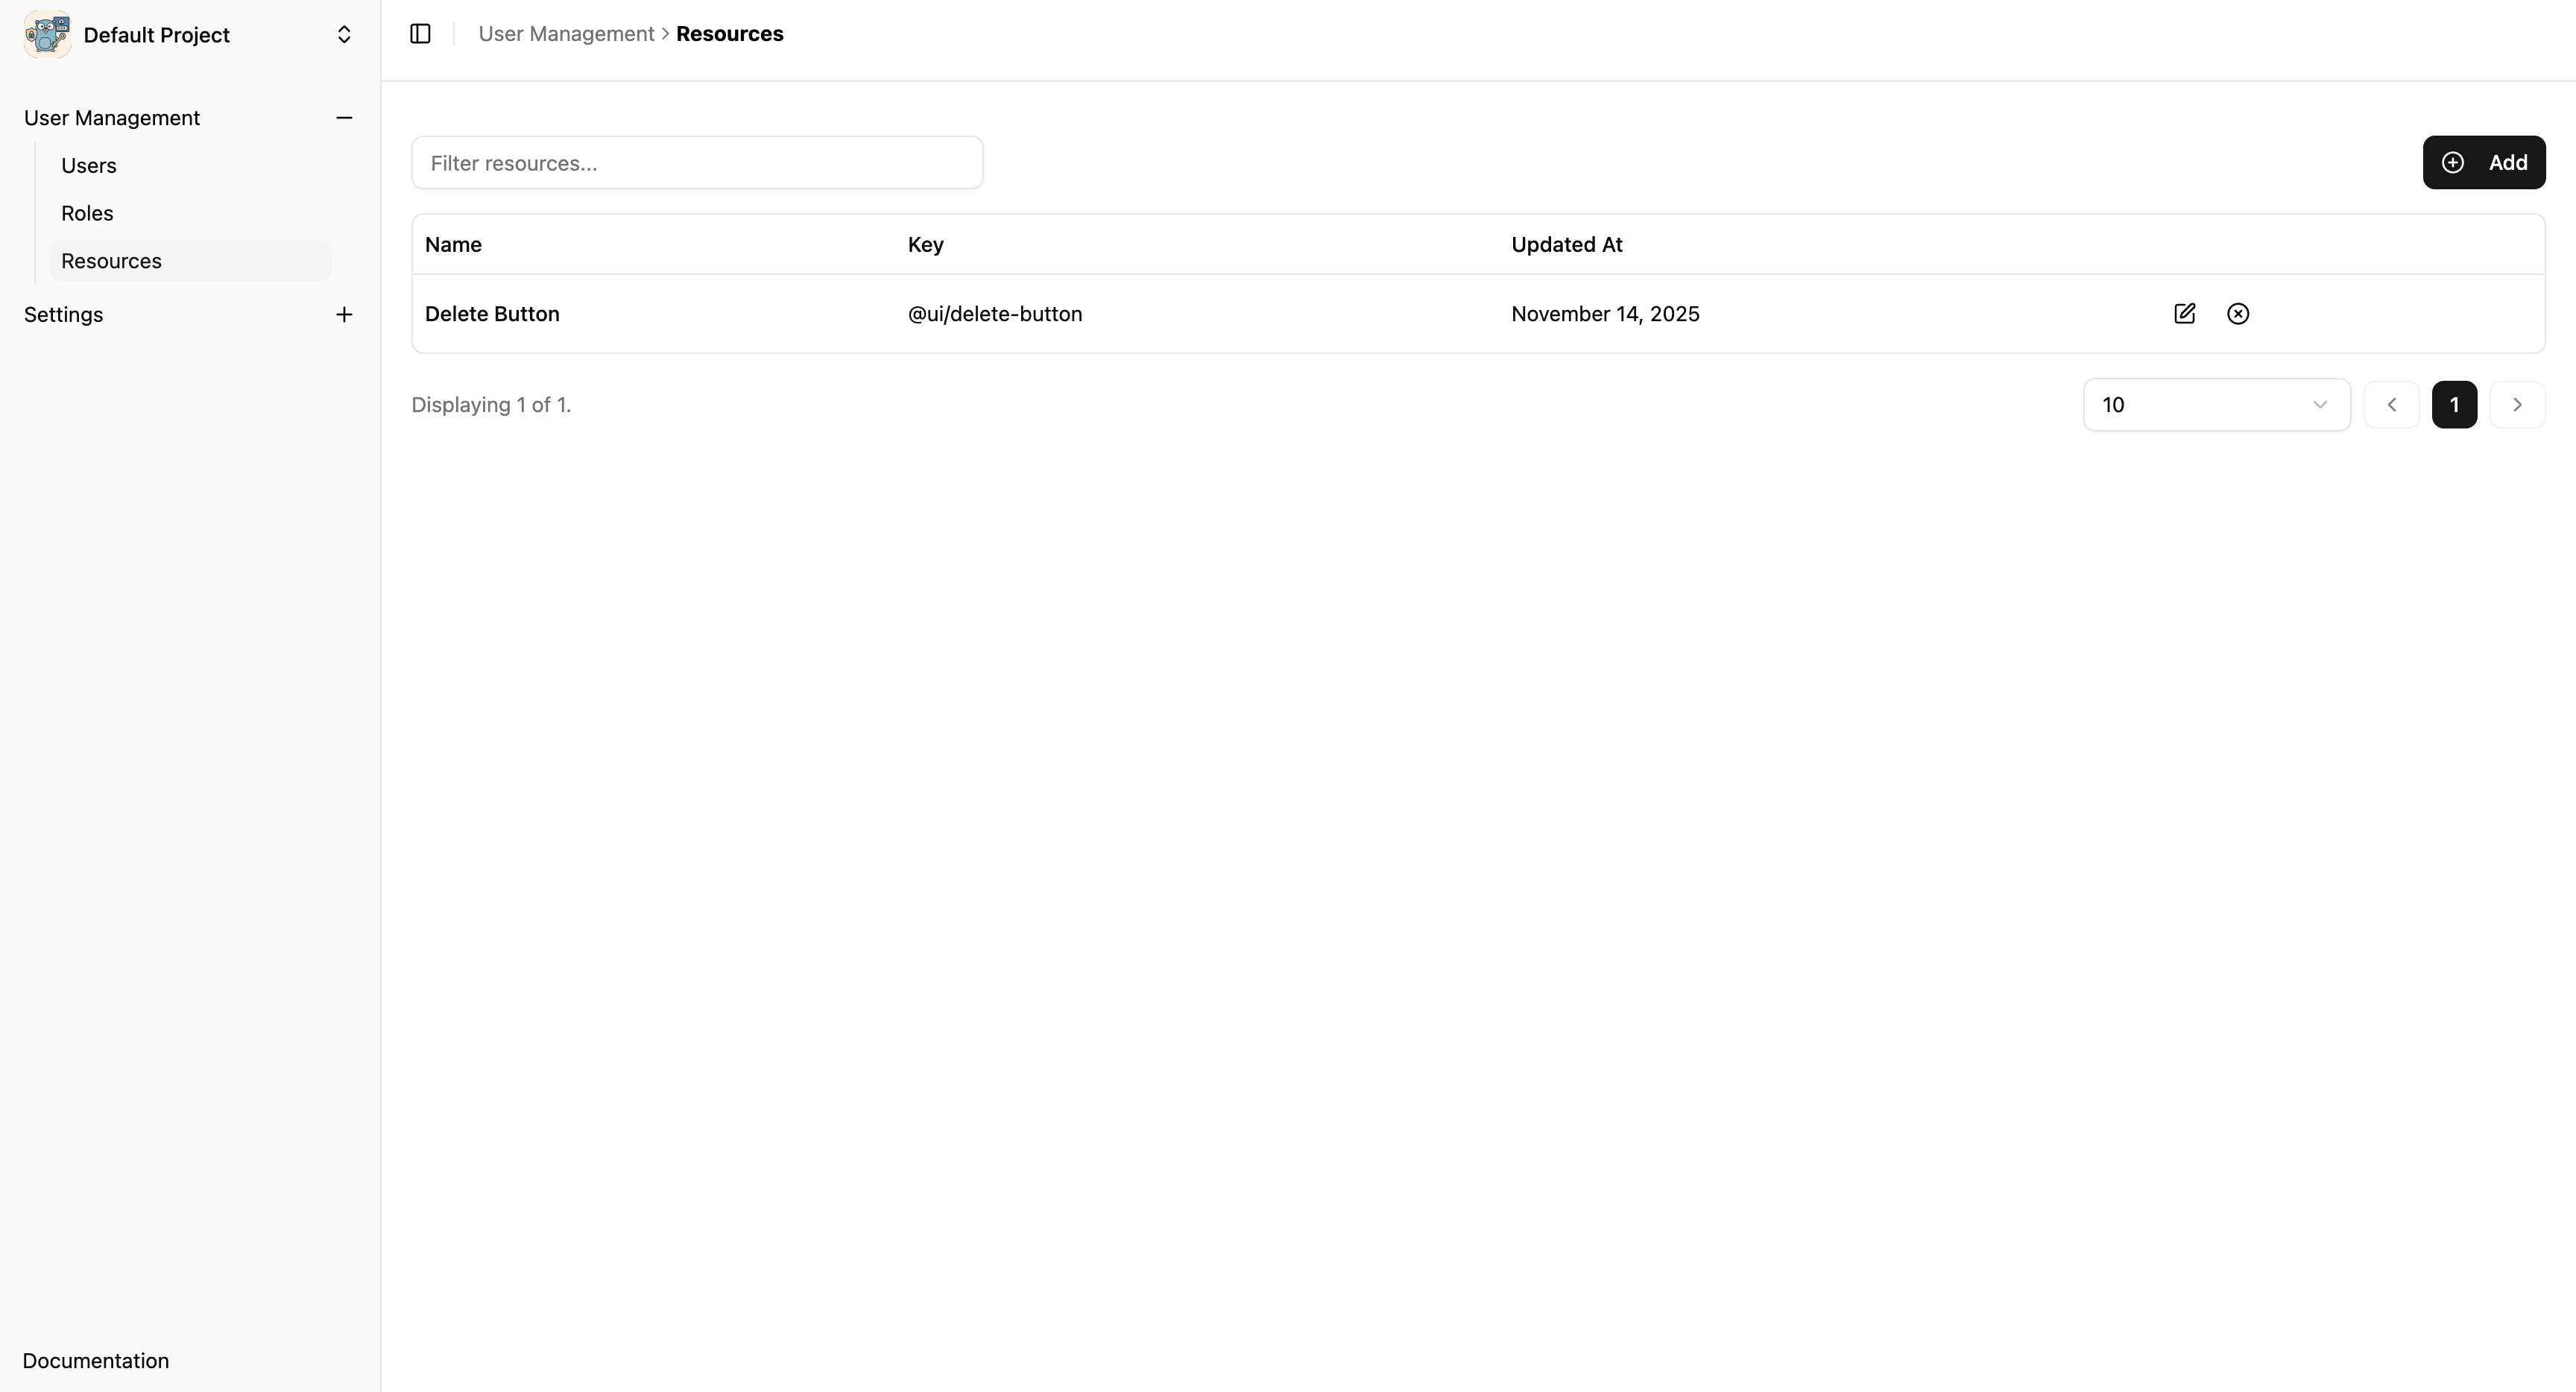
➕ Creating a New Resource
Navigate to Resources
Go to Resources in the sidebar under User Management
List Resources Page
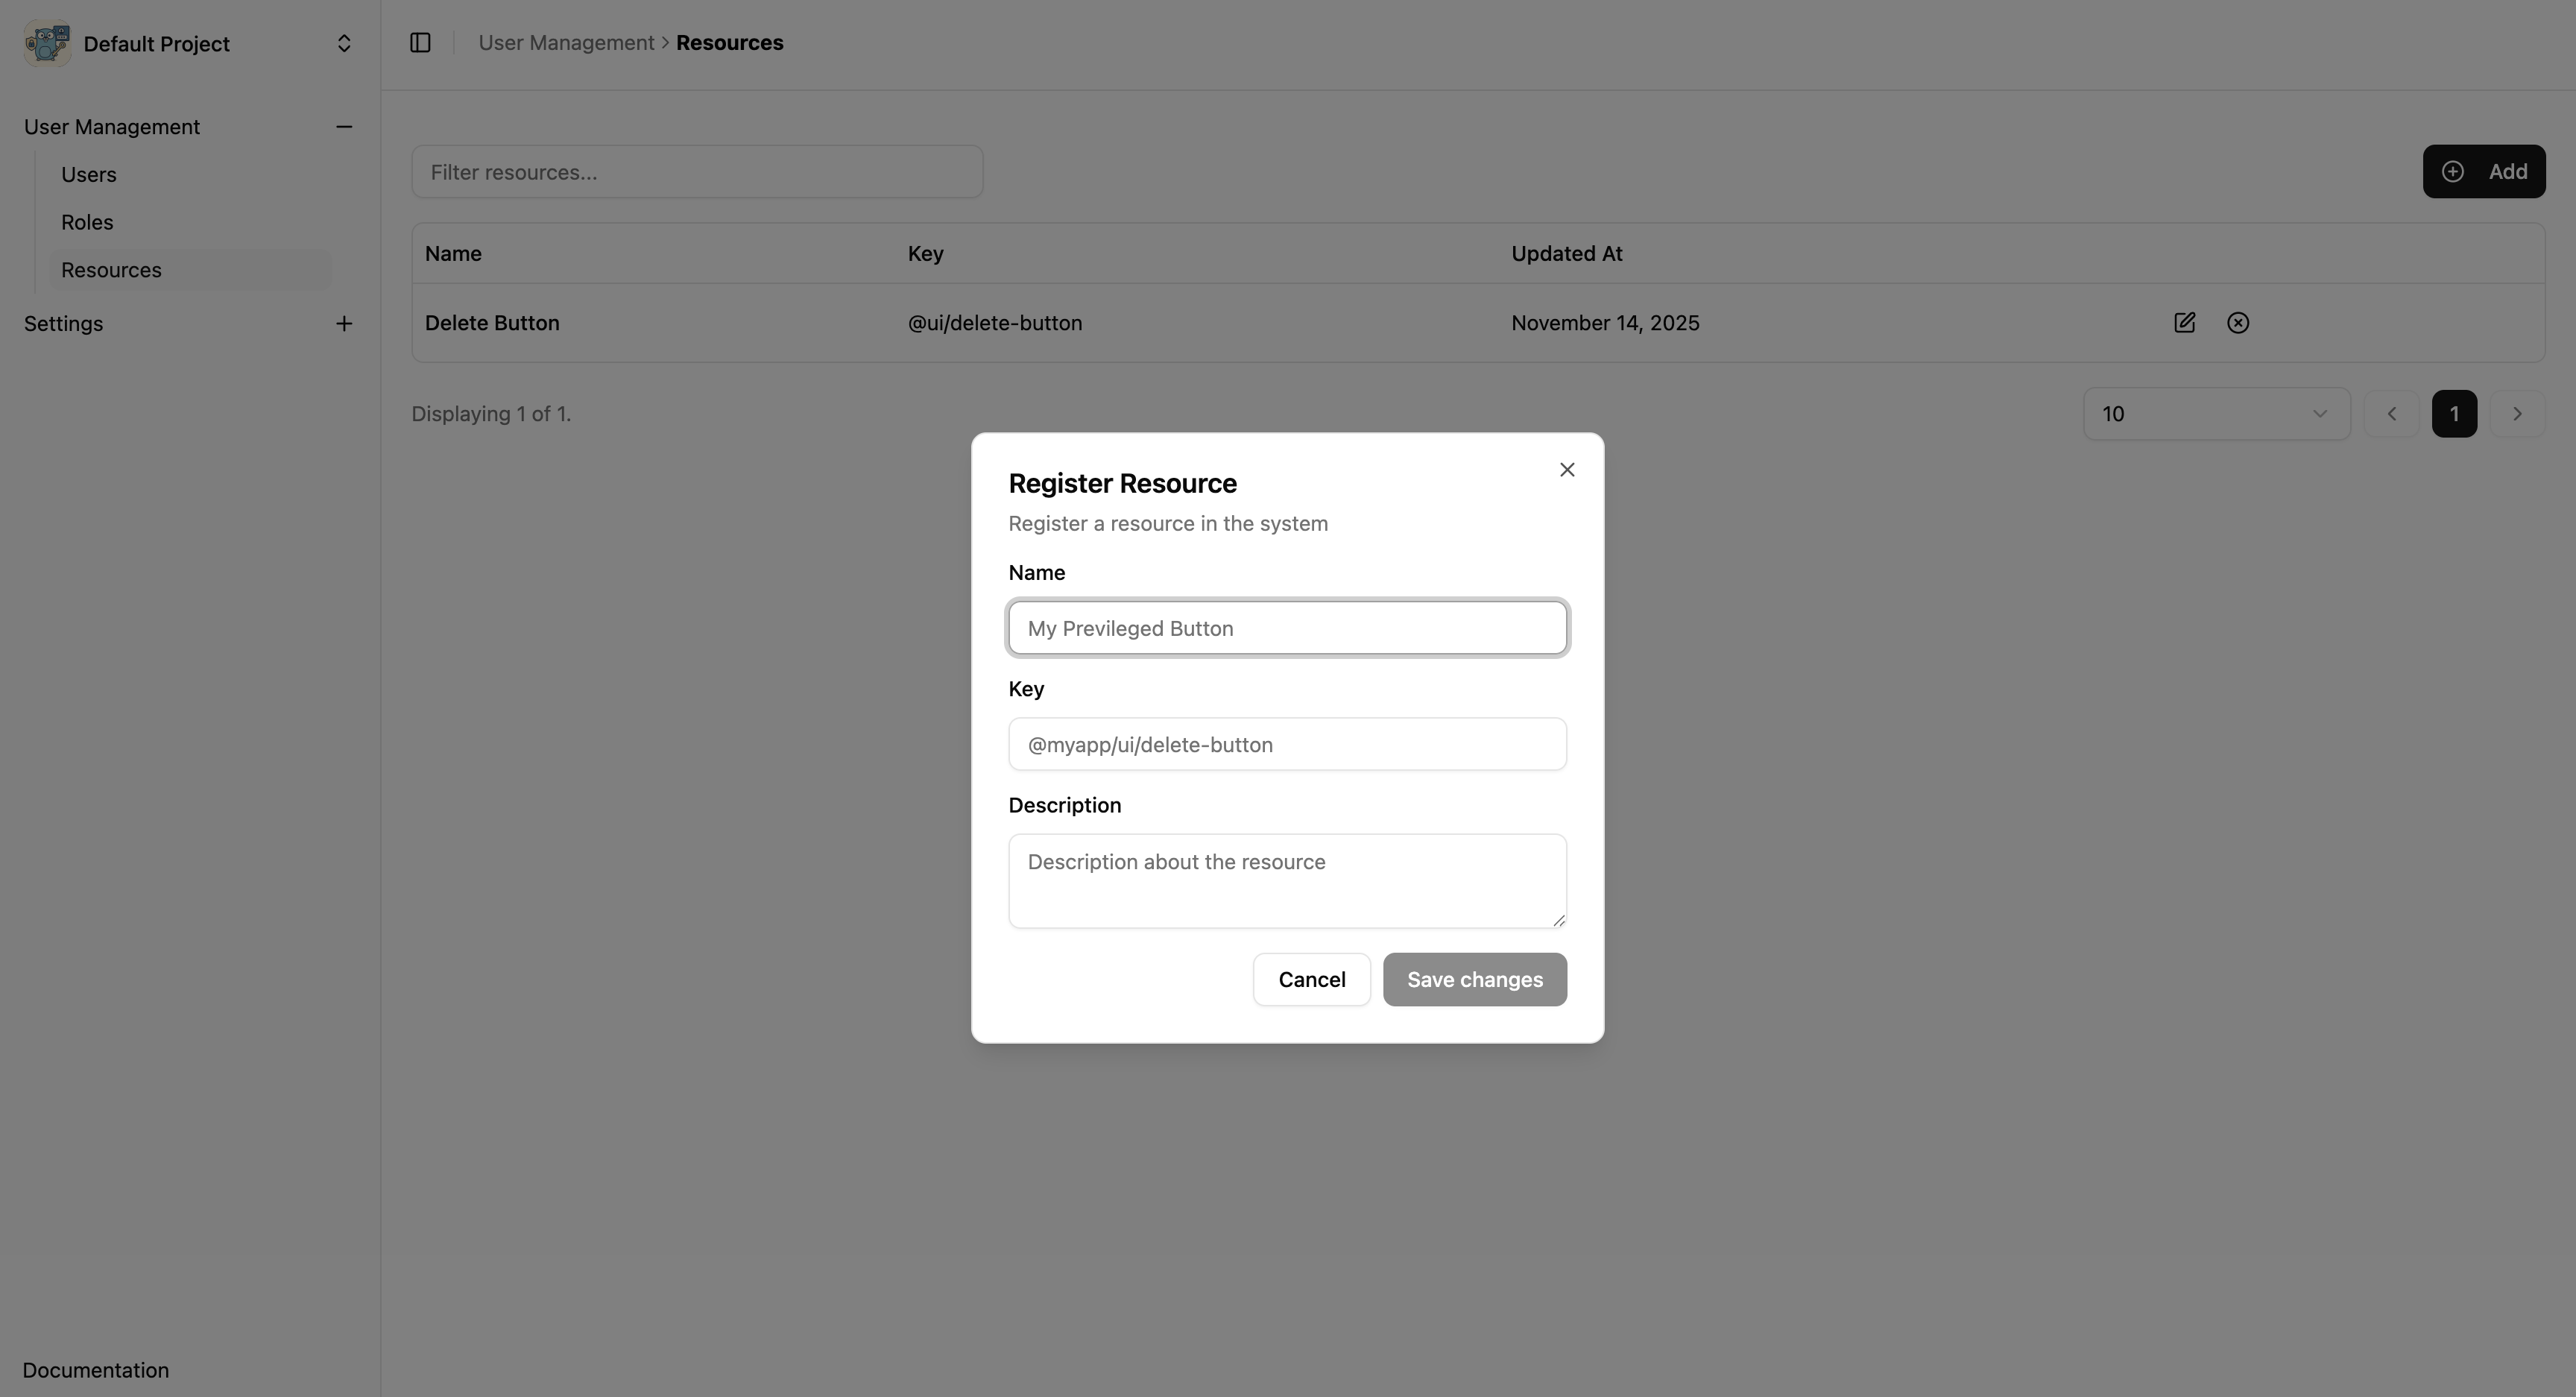
Click on Add Button
Fill in the Resource Details
Name: Descriptive name for the resource
Key: Unique identifier for the resource. Should not be changed after creation
Description: Brief description of the resource
Save Resource
Click Save Changes button
Create Resource Widget
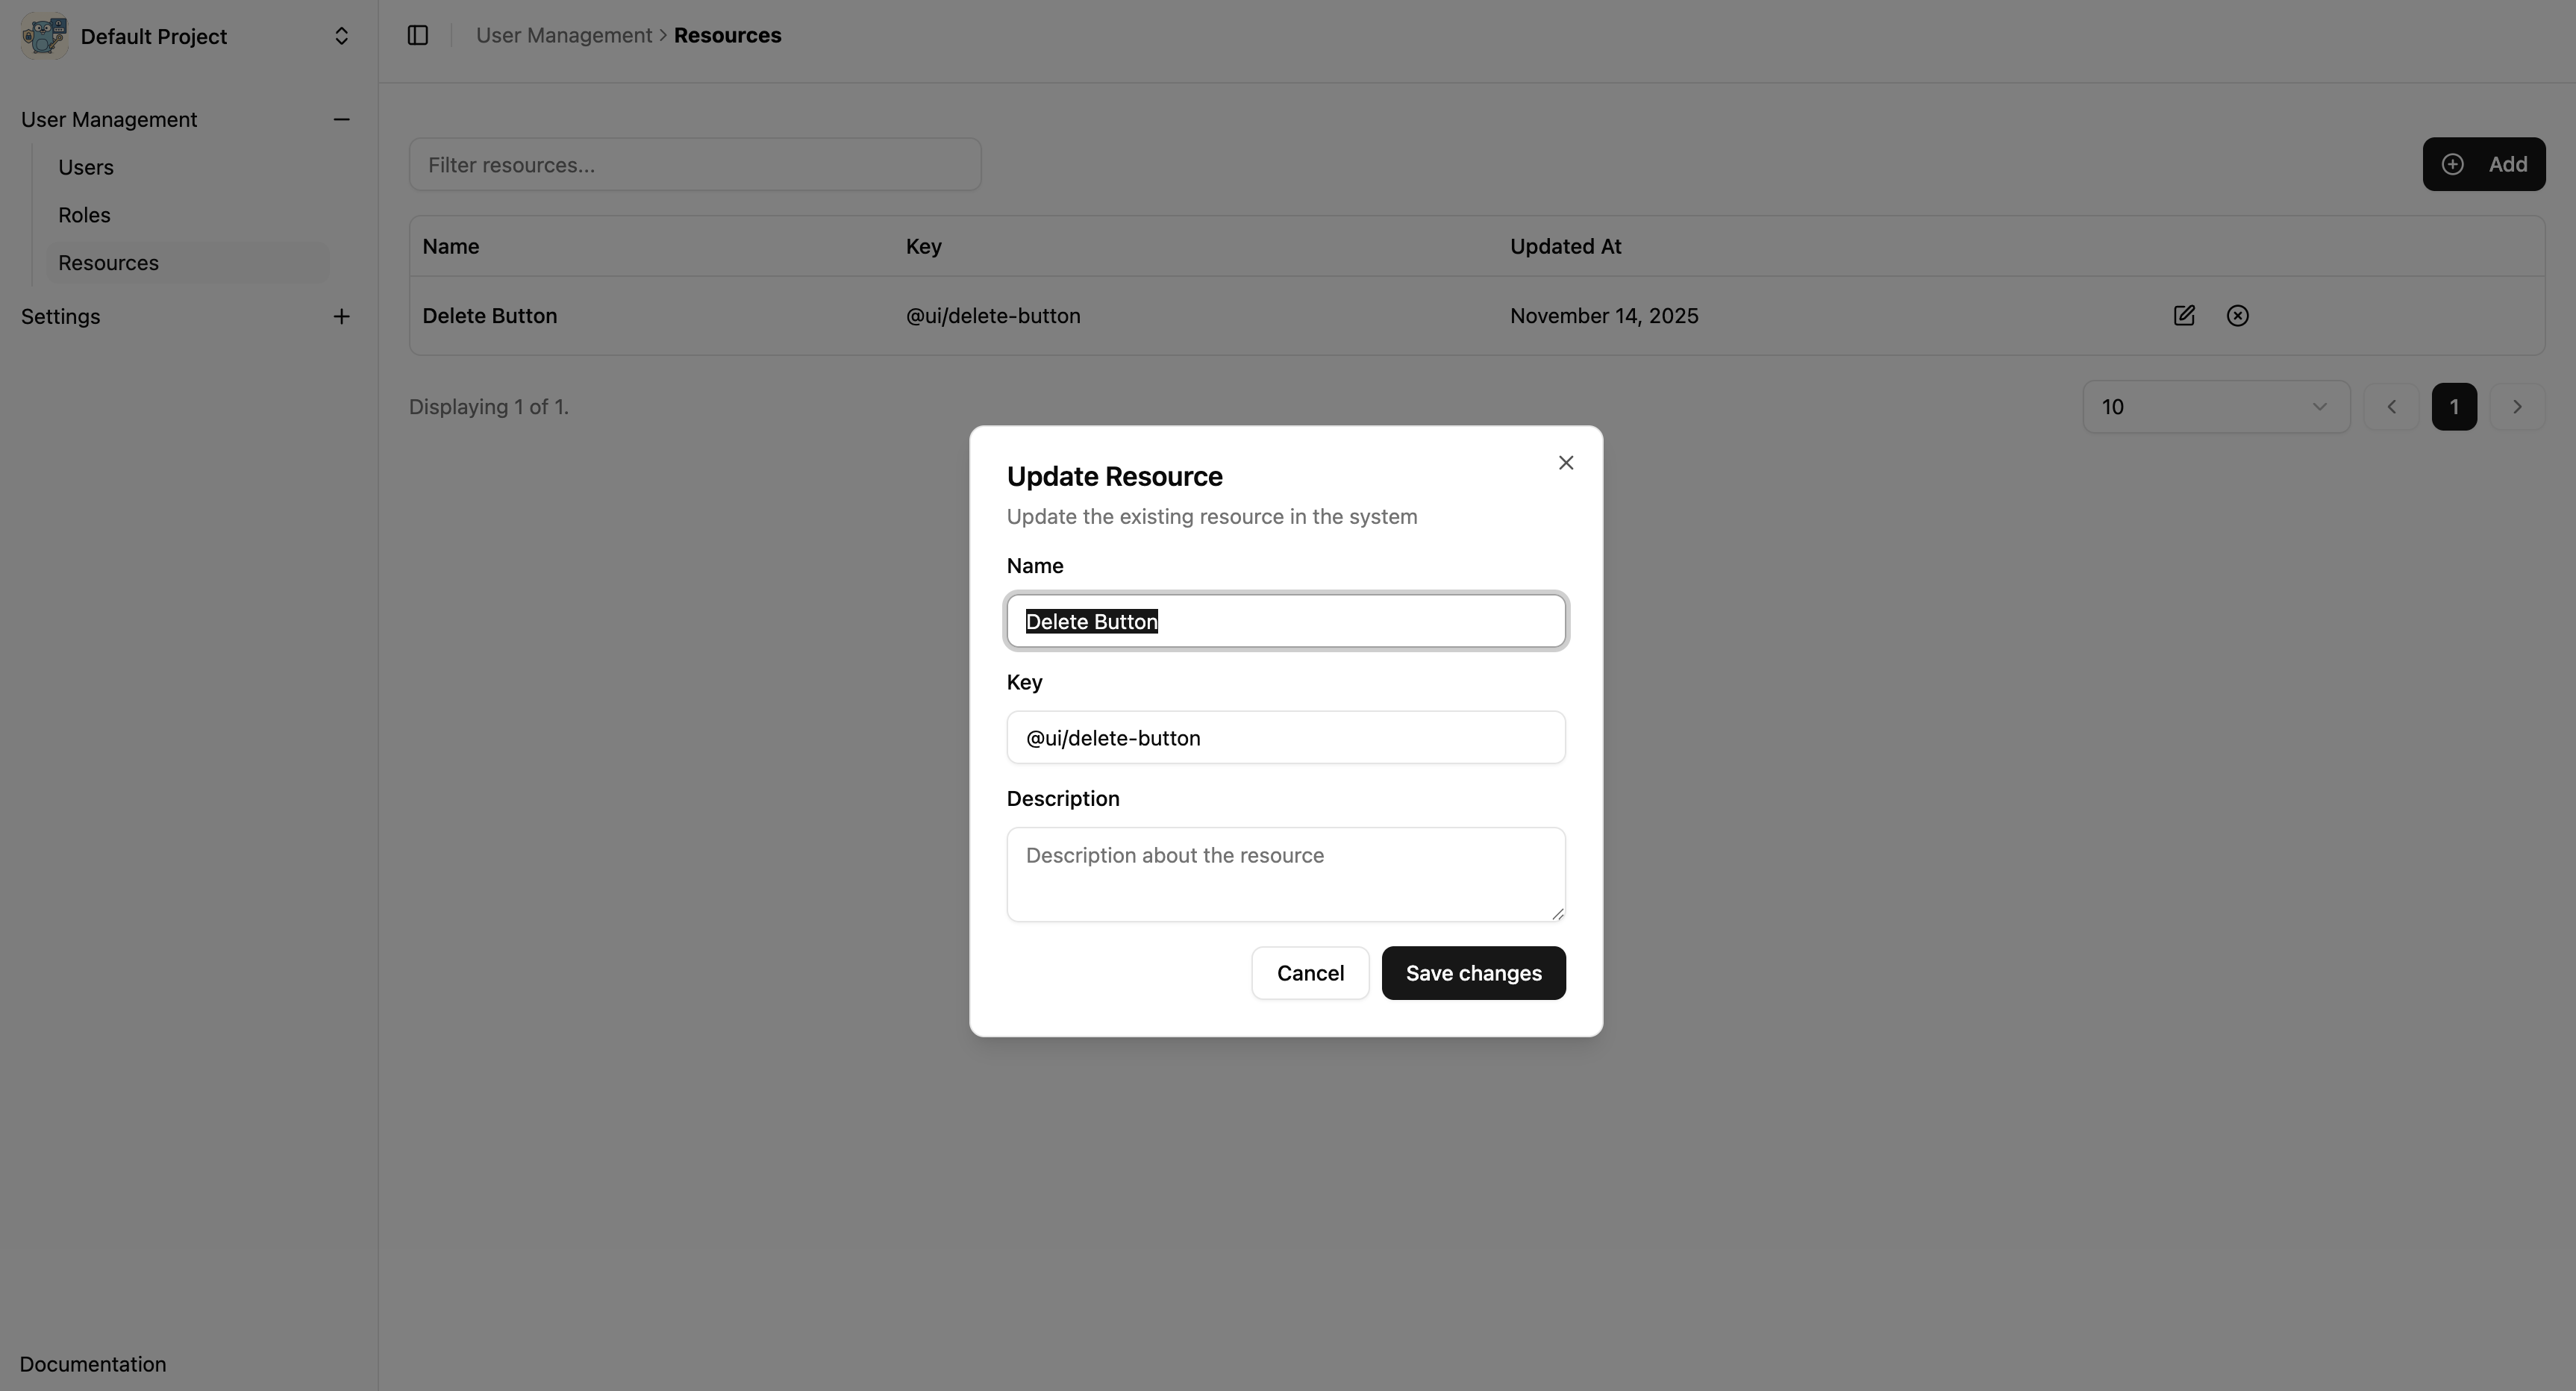
🔄 Updating Resource
To update an existing resource, follow these steps:
Navigate to Resources
Go to Resources in the sidebar under User Management
Select Resource to Edit
Find the resource in the list
Click the Edit button on the right side
Modify Details
Update Name or Description
Save Changes
Click Save Changes to apply updates
Update Resource Widget
Disable Resource
To disable a resource, follow these steps:
Navigate to Resources
Go to Resources in the sidebar under User Management
Select Resource to Disable
Find the resource in the list
Click the Disable button on the right side
Confirm Disable
A confirmation dialog will appear
Click Disable Resource to permanently disable the resource
Disable Resource Confirmation Widget
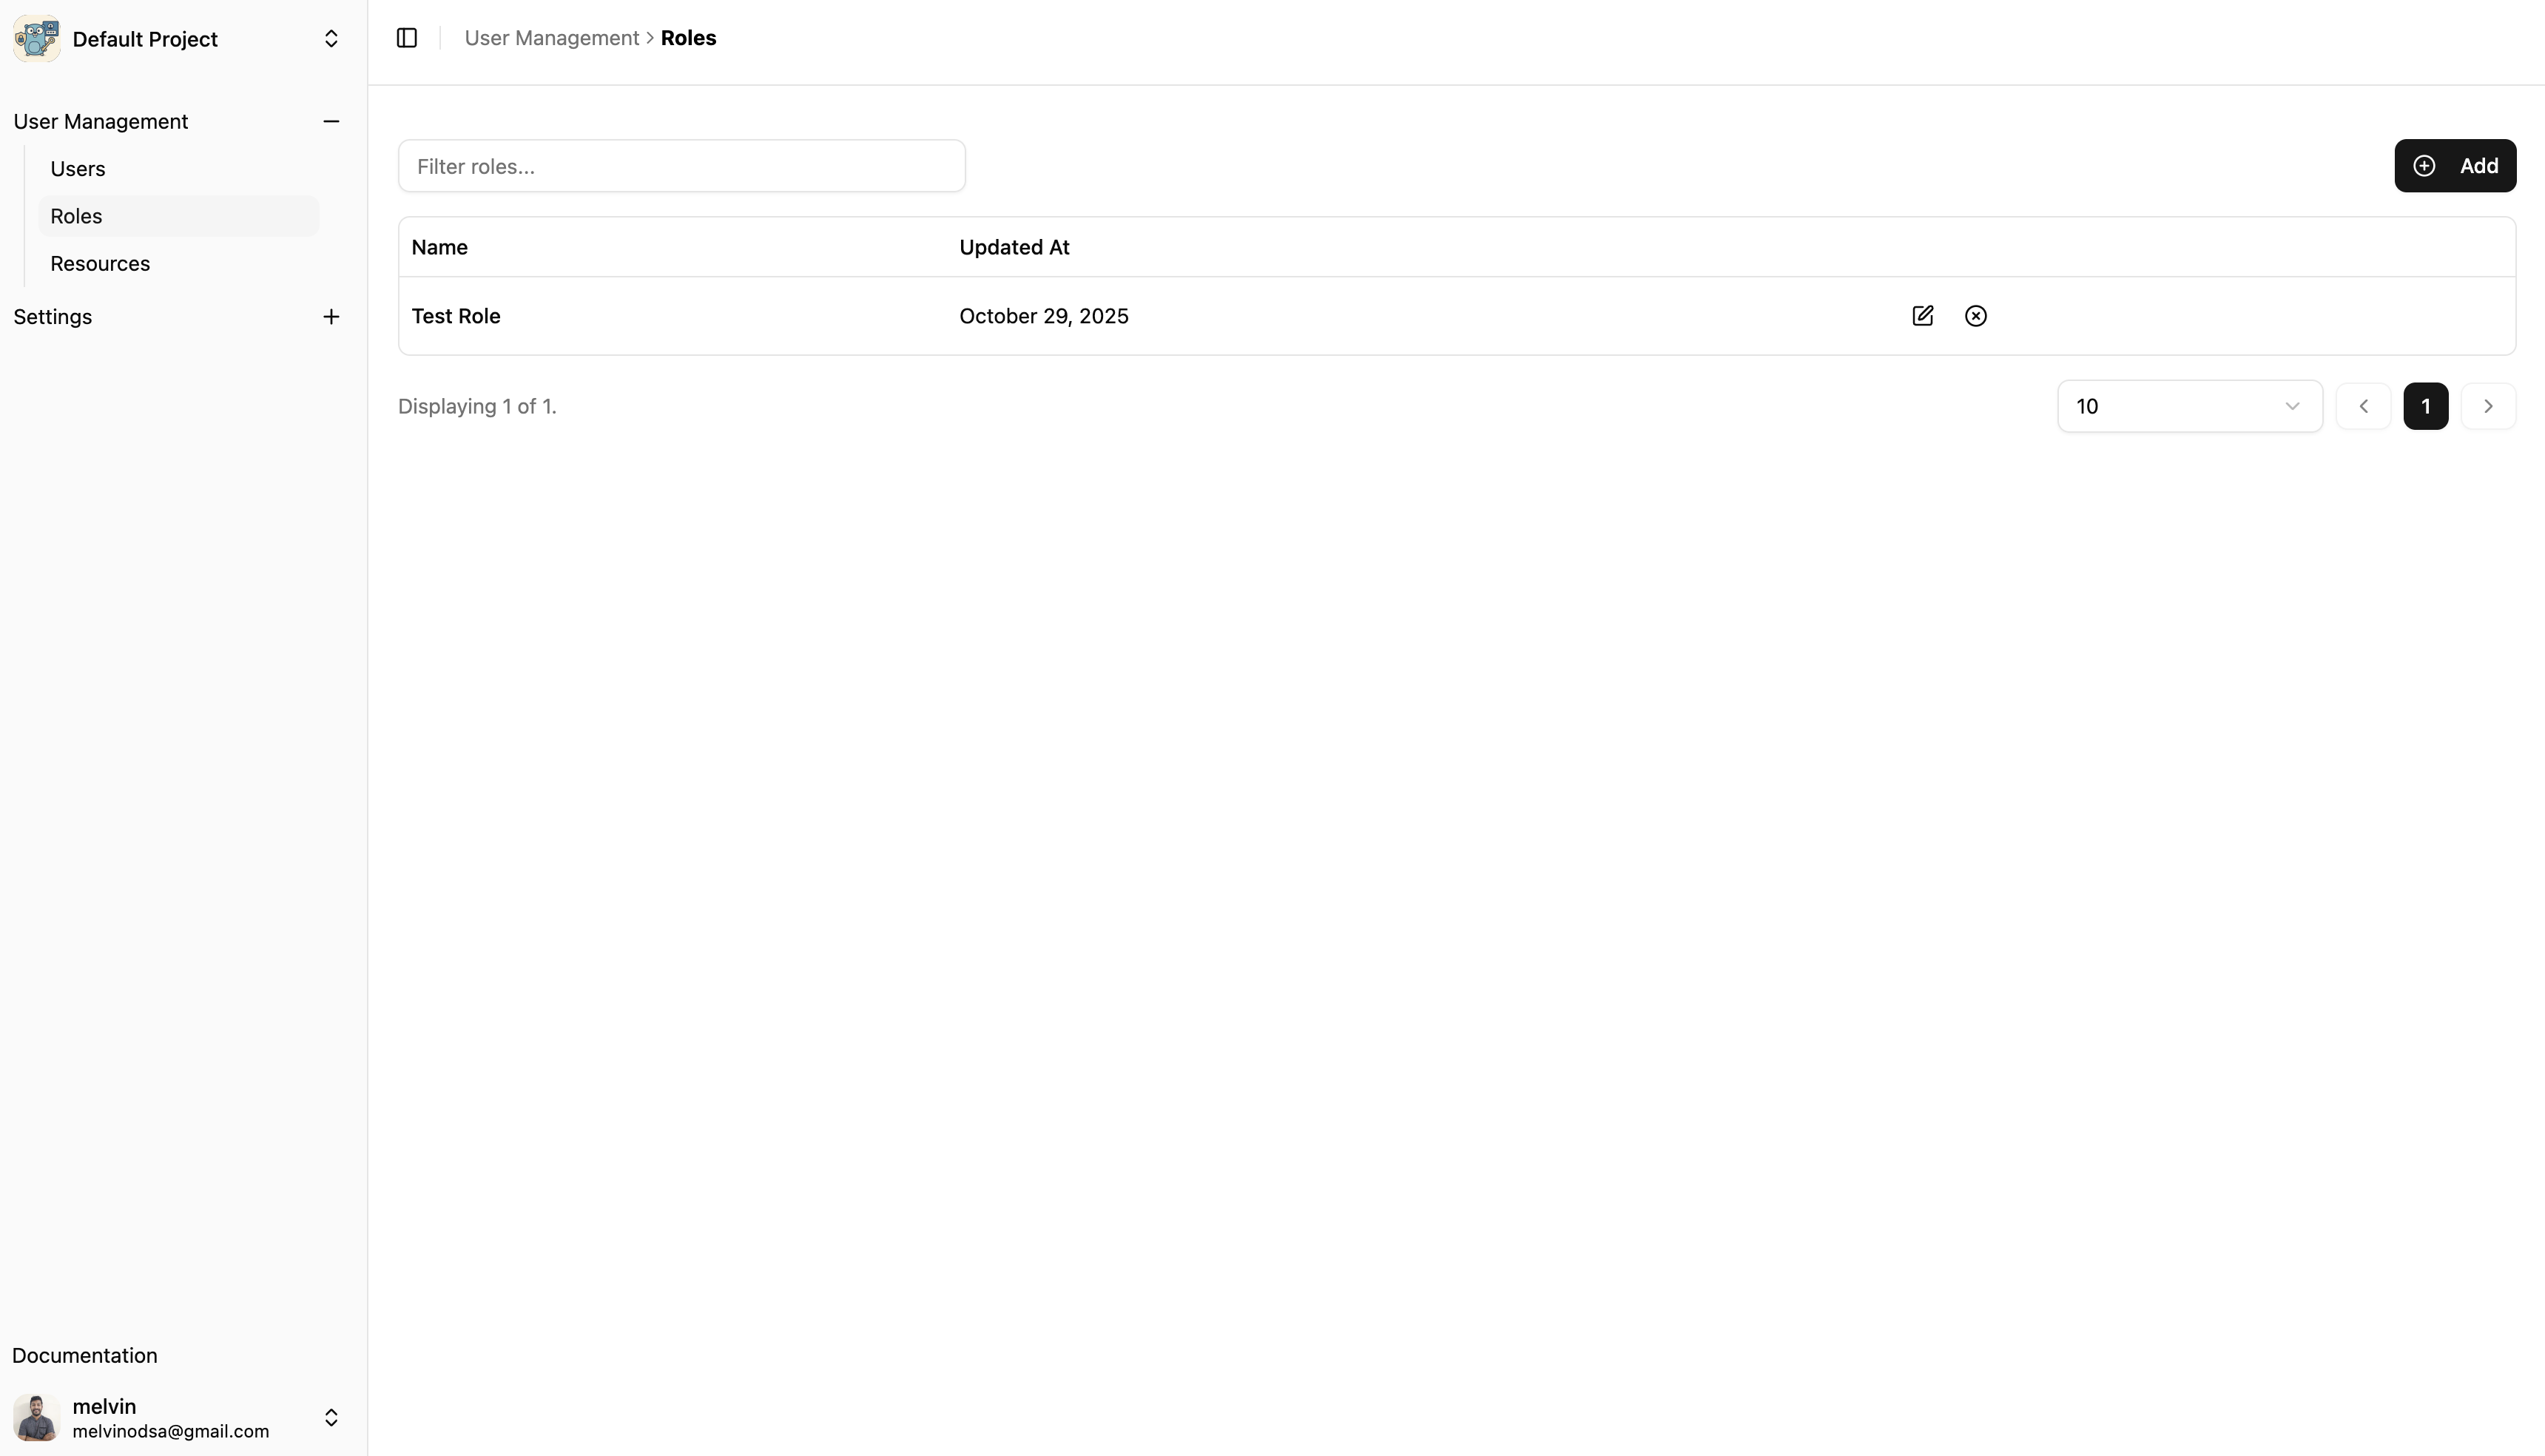
Roles
Roles define a set of permissions that can be assigned to users. They help manage access control efficiently by grouping permissions together.
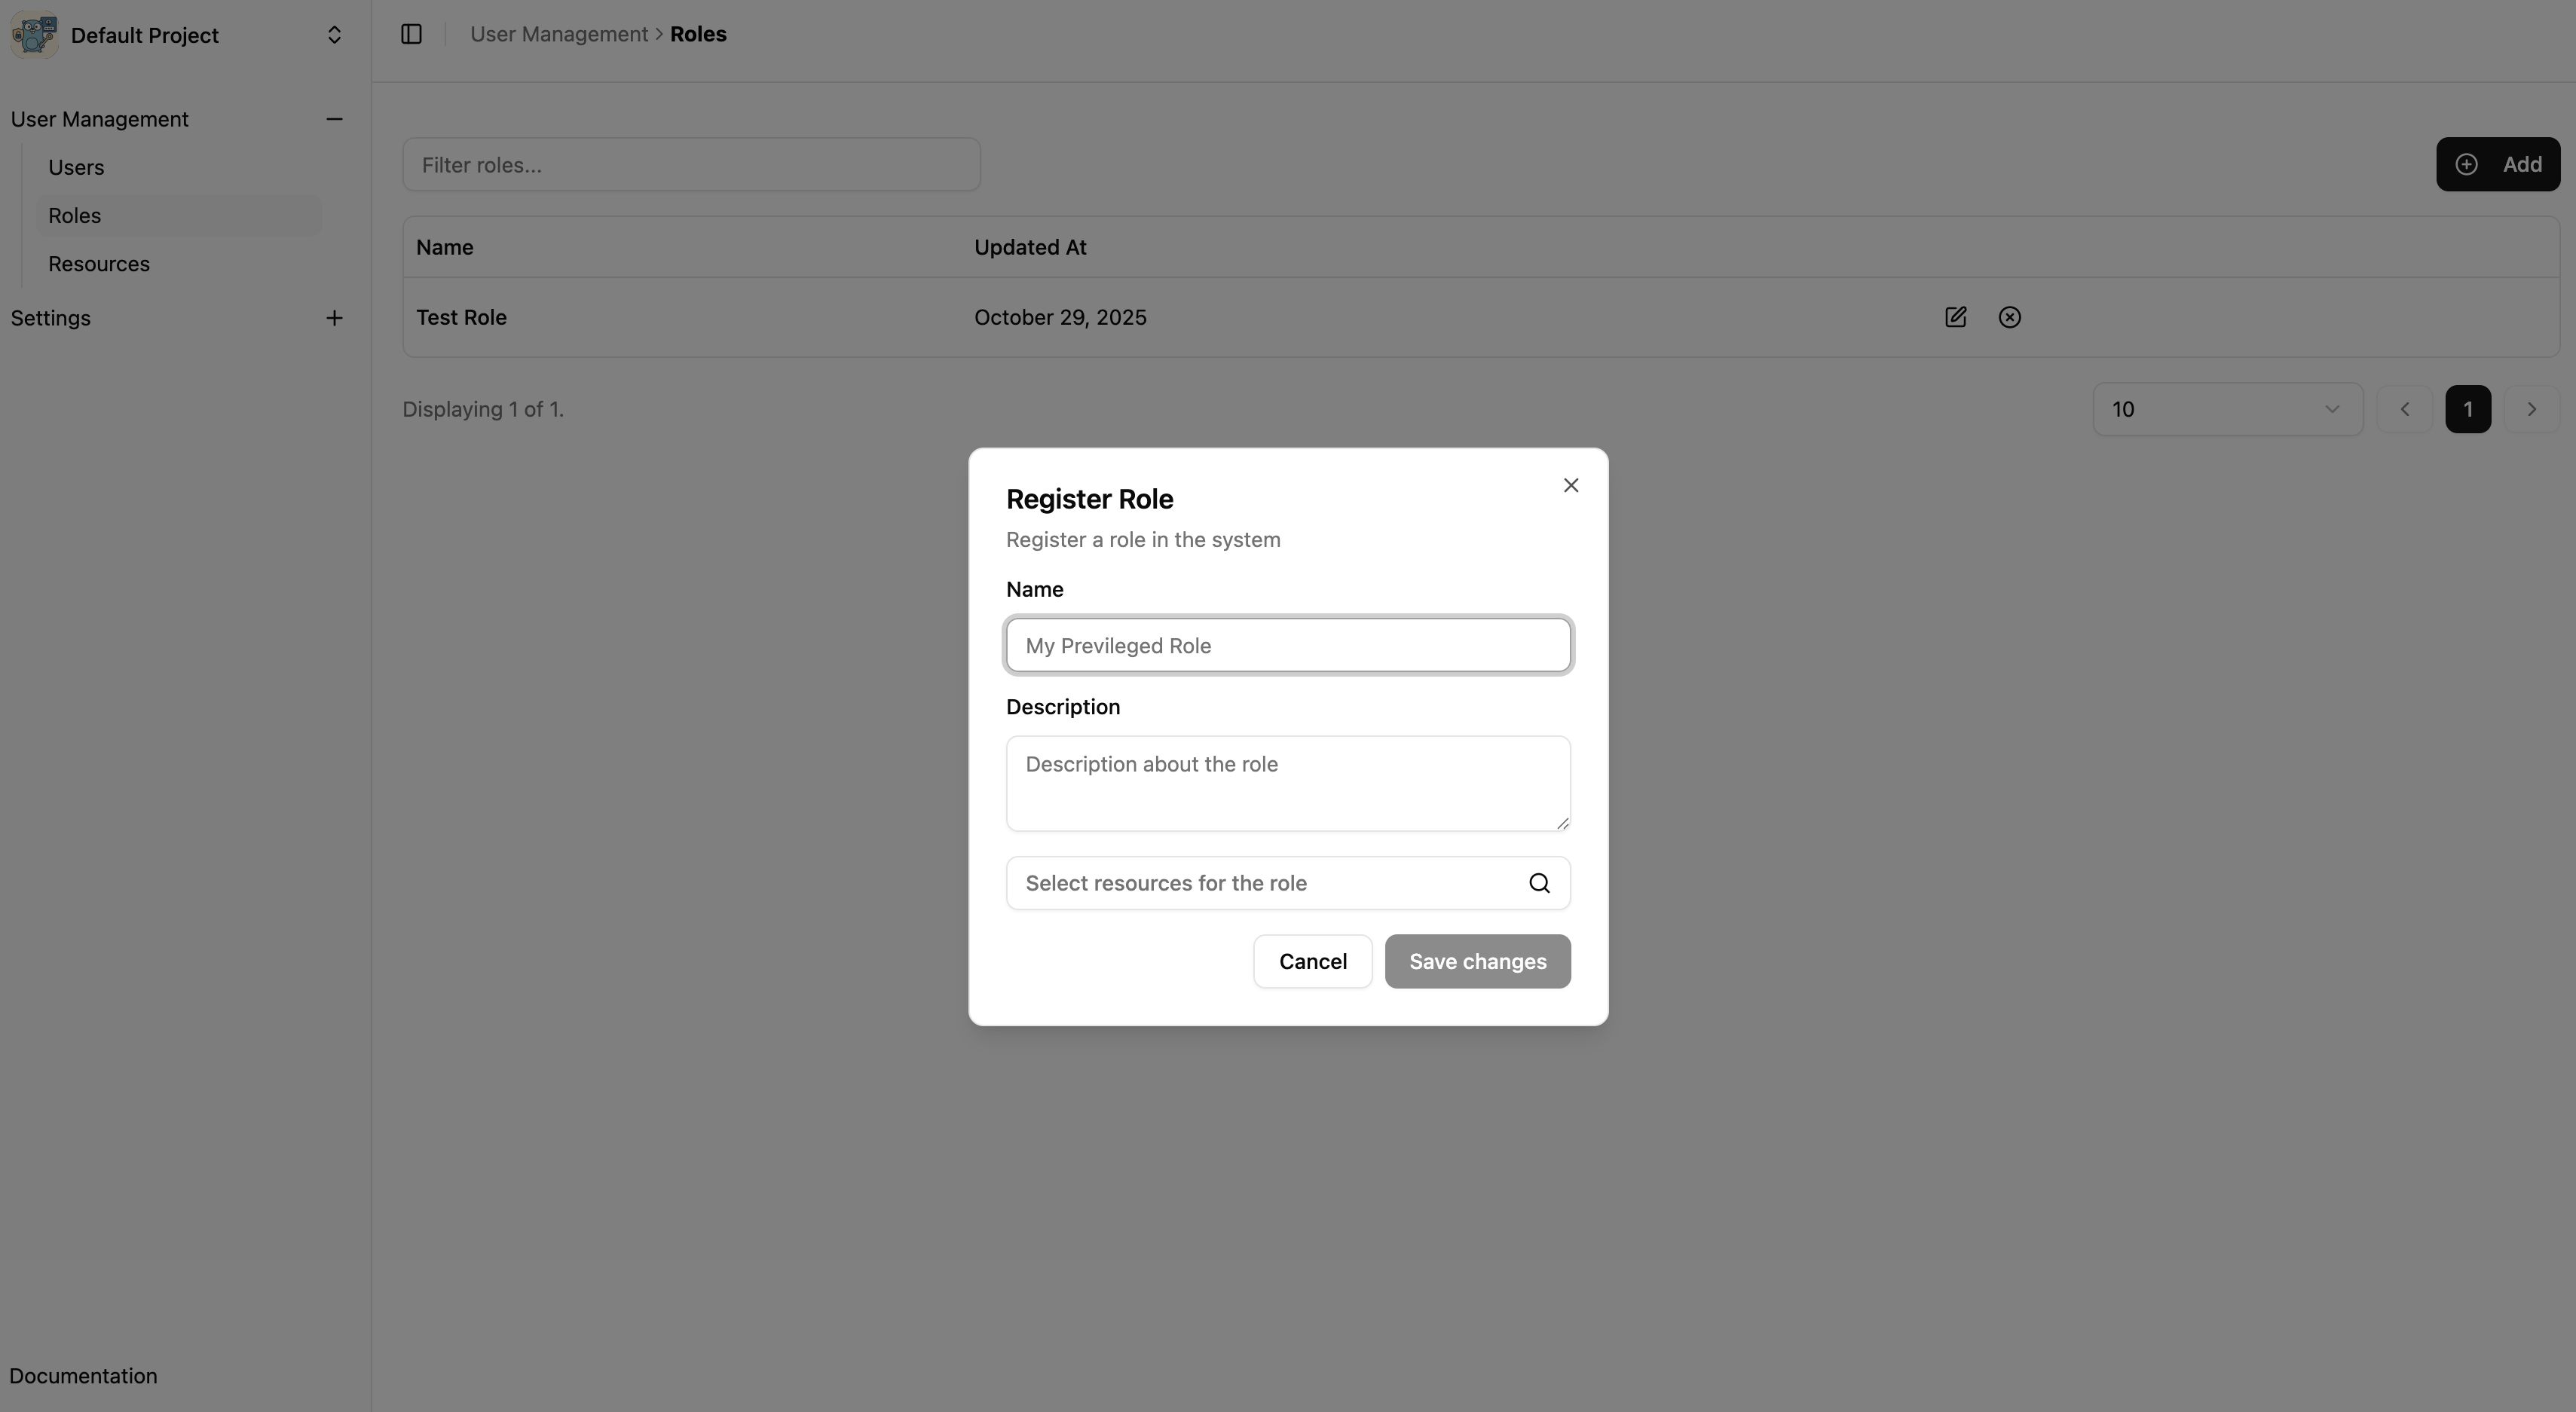
➕ Creating a New Role
Navigate to Roles
Go to Roles in the sidebar under User Management
List Roles Page
Click on Add Button
Fill in the Role Details
Name: Descriptive name for the role
Description: Brief description of the role
Create Role Widget
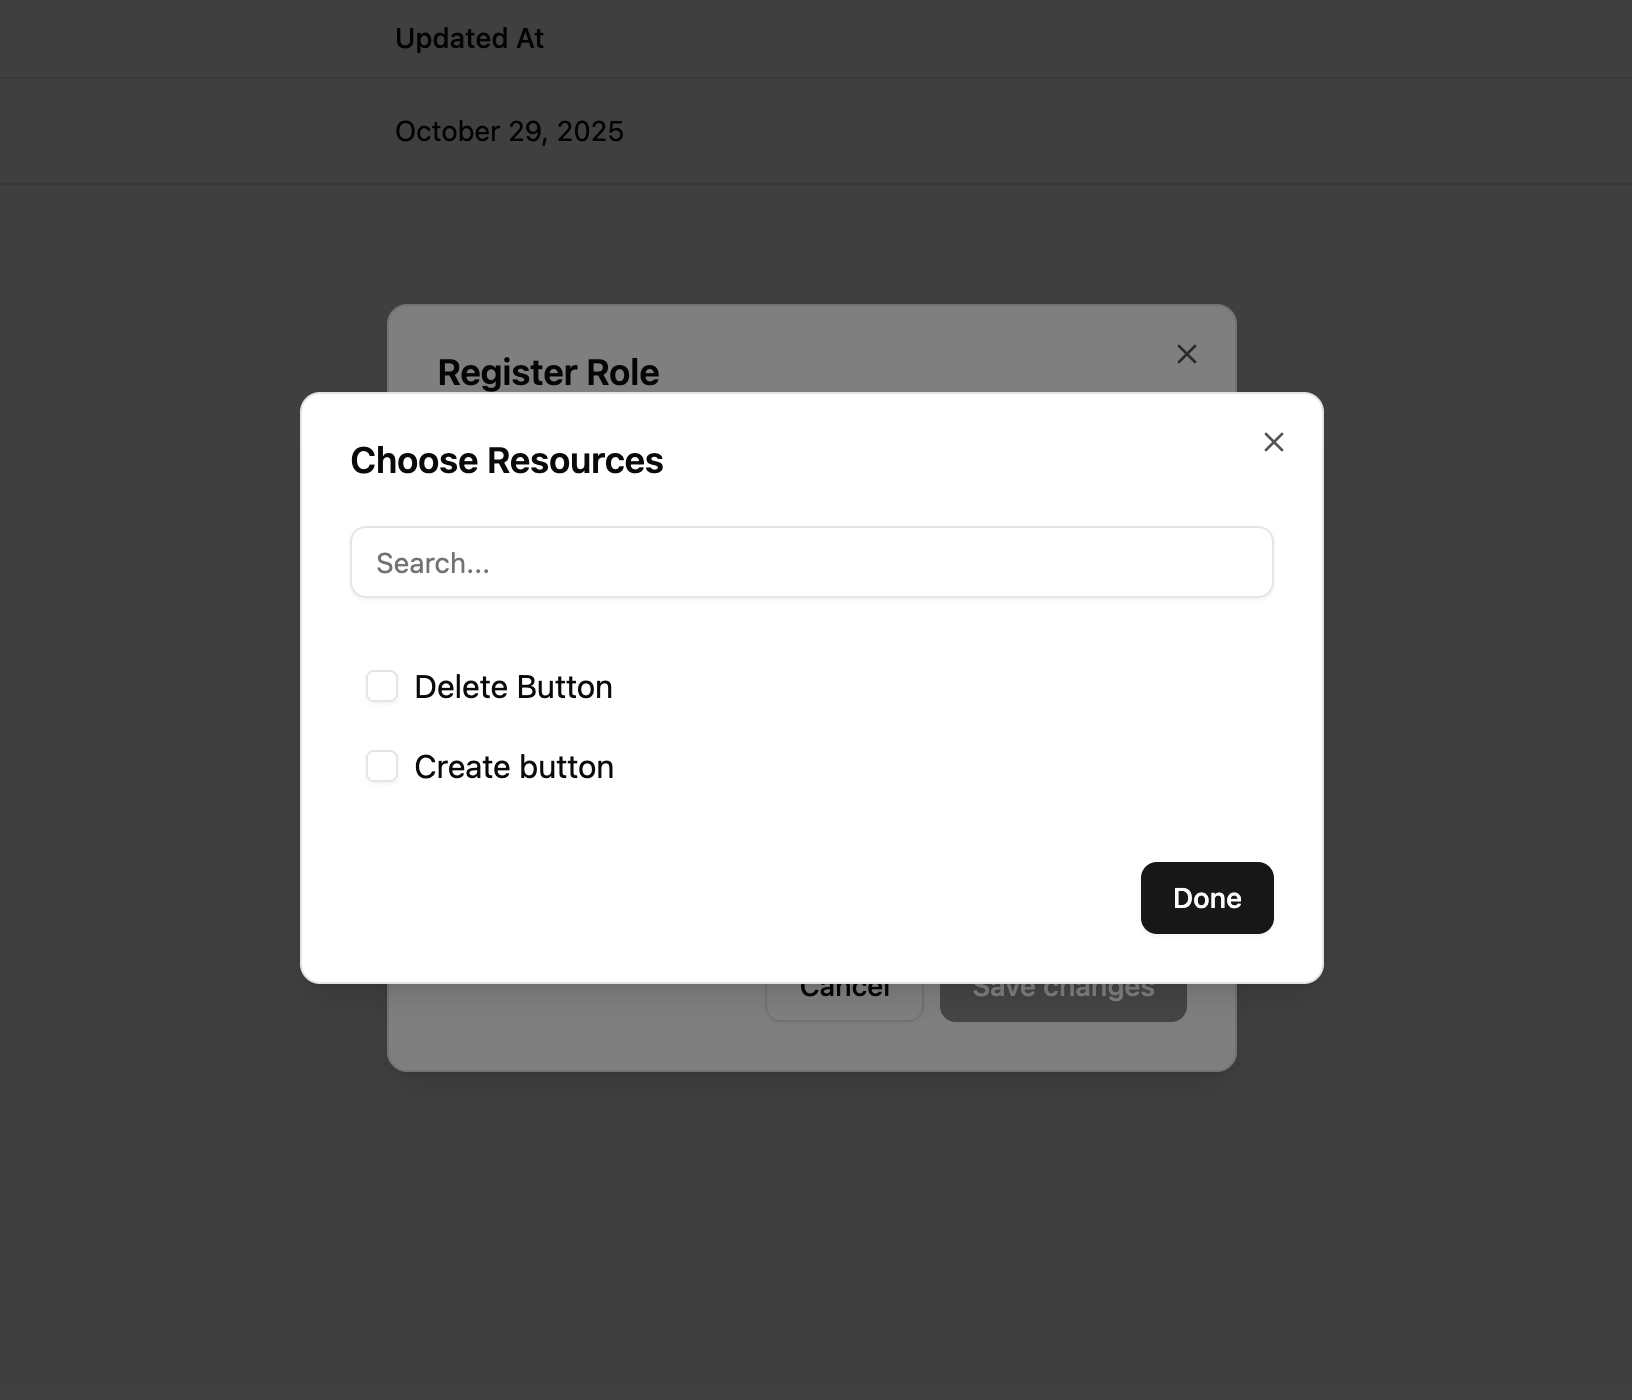
Assign Resources
Select resources and define permissions for each
Save Role
Click Save Changes button
Assign Resources to Role Widget
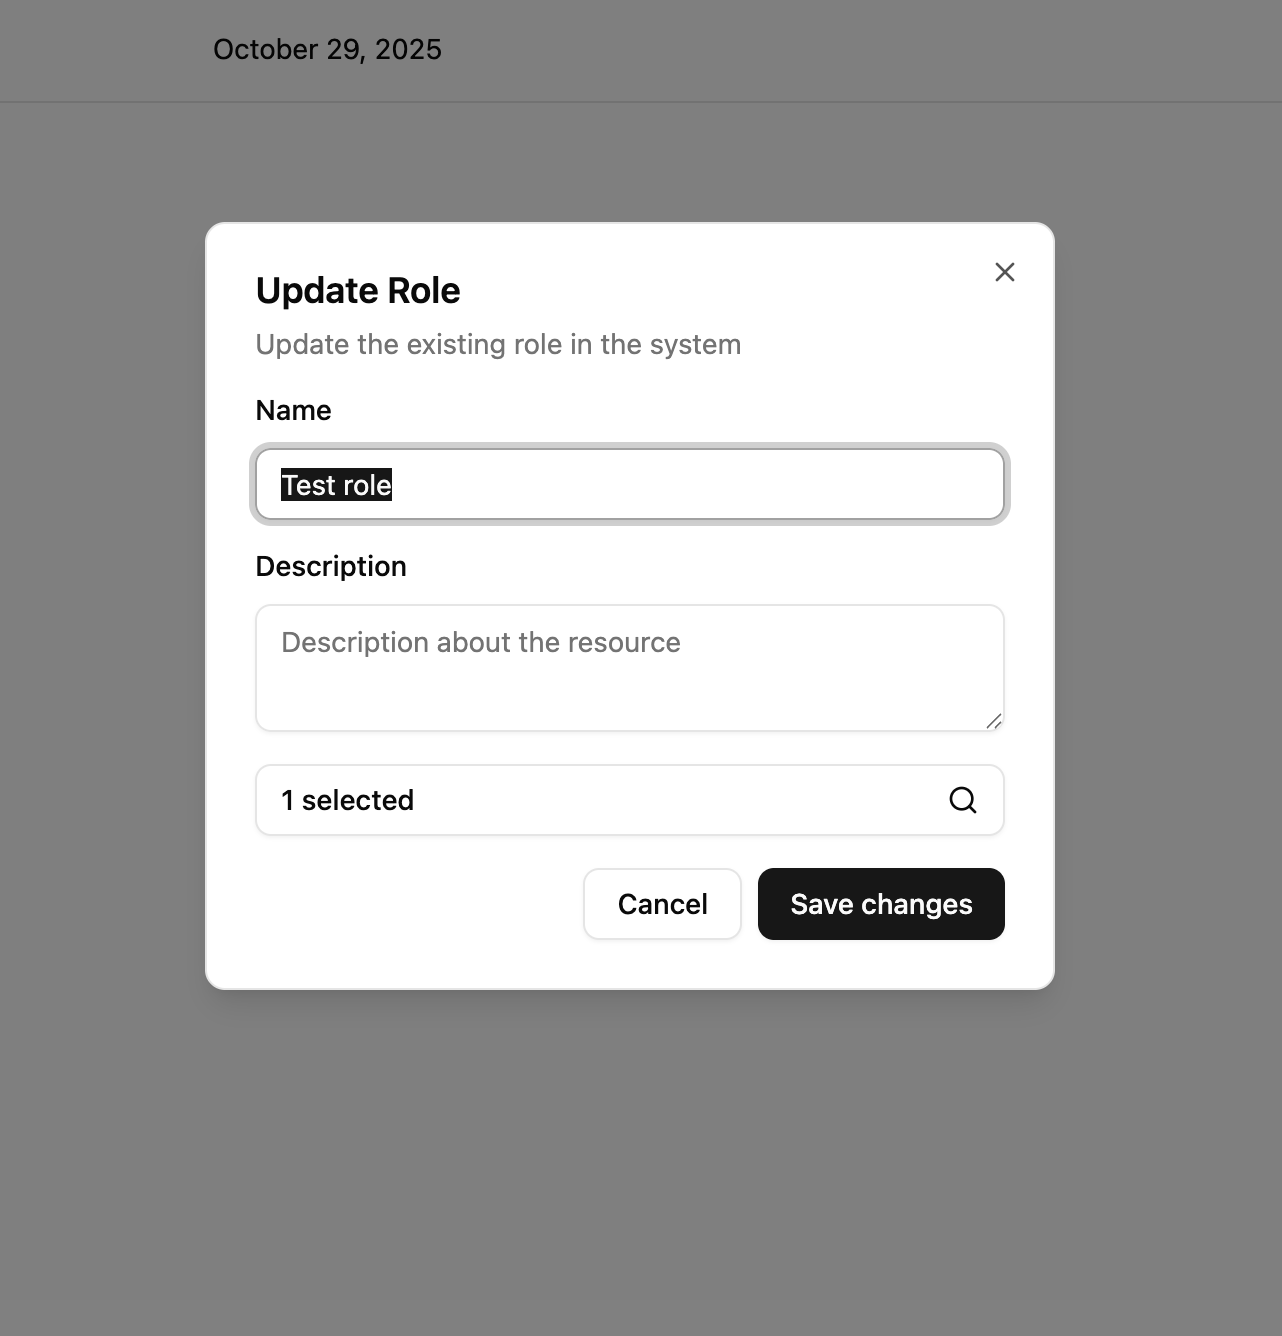
🔄 Updating Role
To update an existing role, follow these steps:
Navigate to Roles
Go to Roles in the sidebar under User Management
Select Role to Edit
Find the role in the list
Click the Edit button on the right side
Modify Details
Update Name, Description, or resource permissions
Save Changes
Click Save Changes to apply updates
Update Role Widget
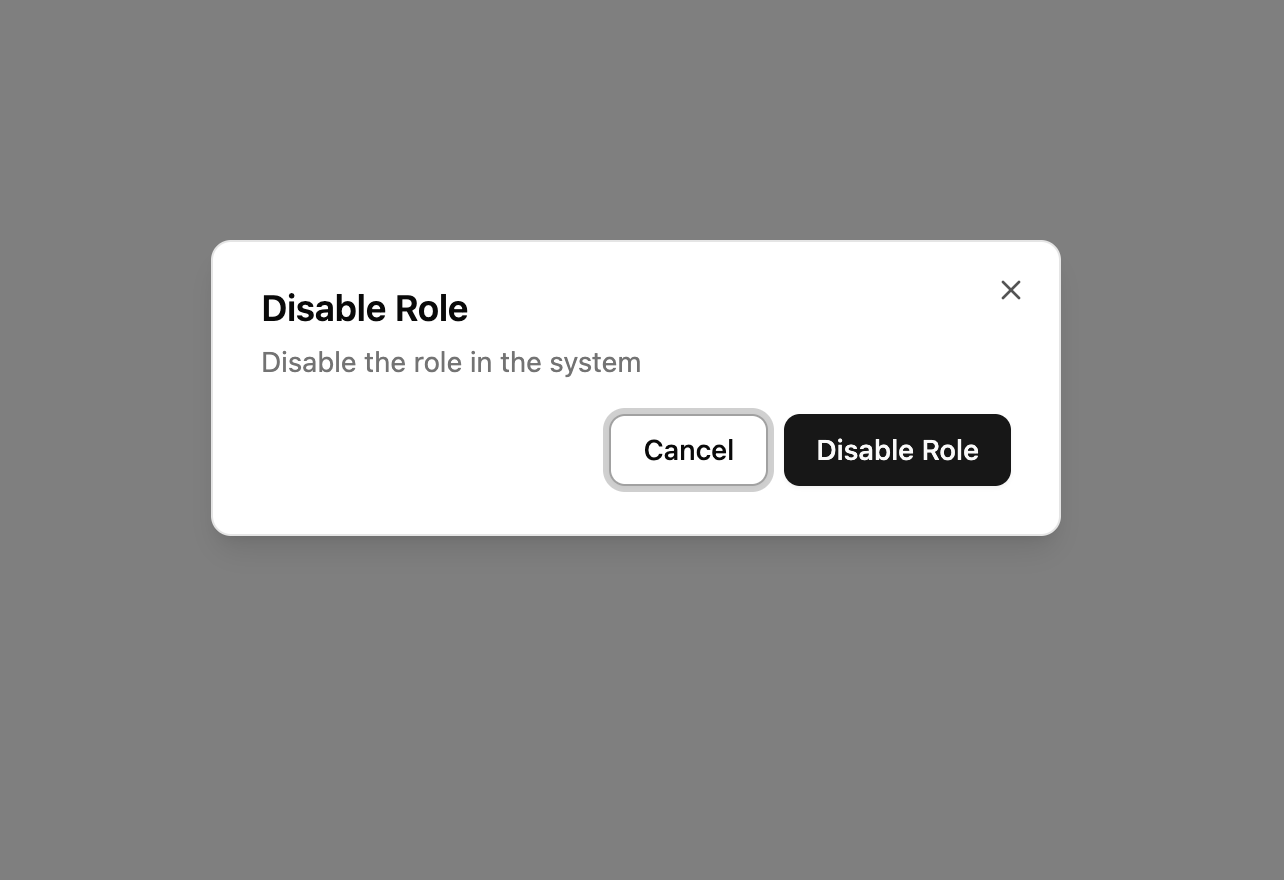
Disable Role
To disable a role, follow these steps:
Navigate to Roles
Go to Roles in the sidebar under User Management
Select Role to Disable
Find the role in the list
Click the Disable button on the right side
Confirm Disable
A confirmation dialog will appear
Click Disable Role to permanently disable the role
Disable Role Confirmation Widget
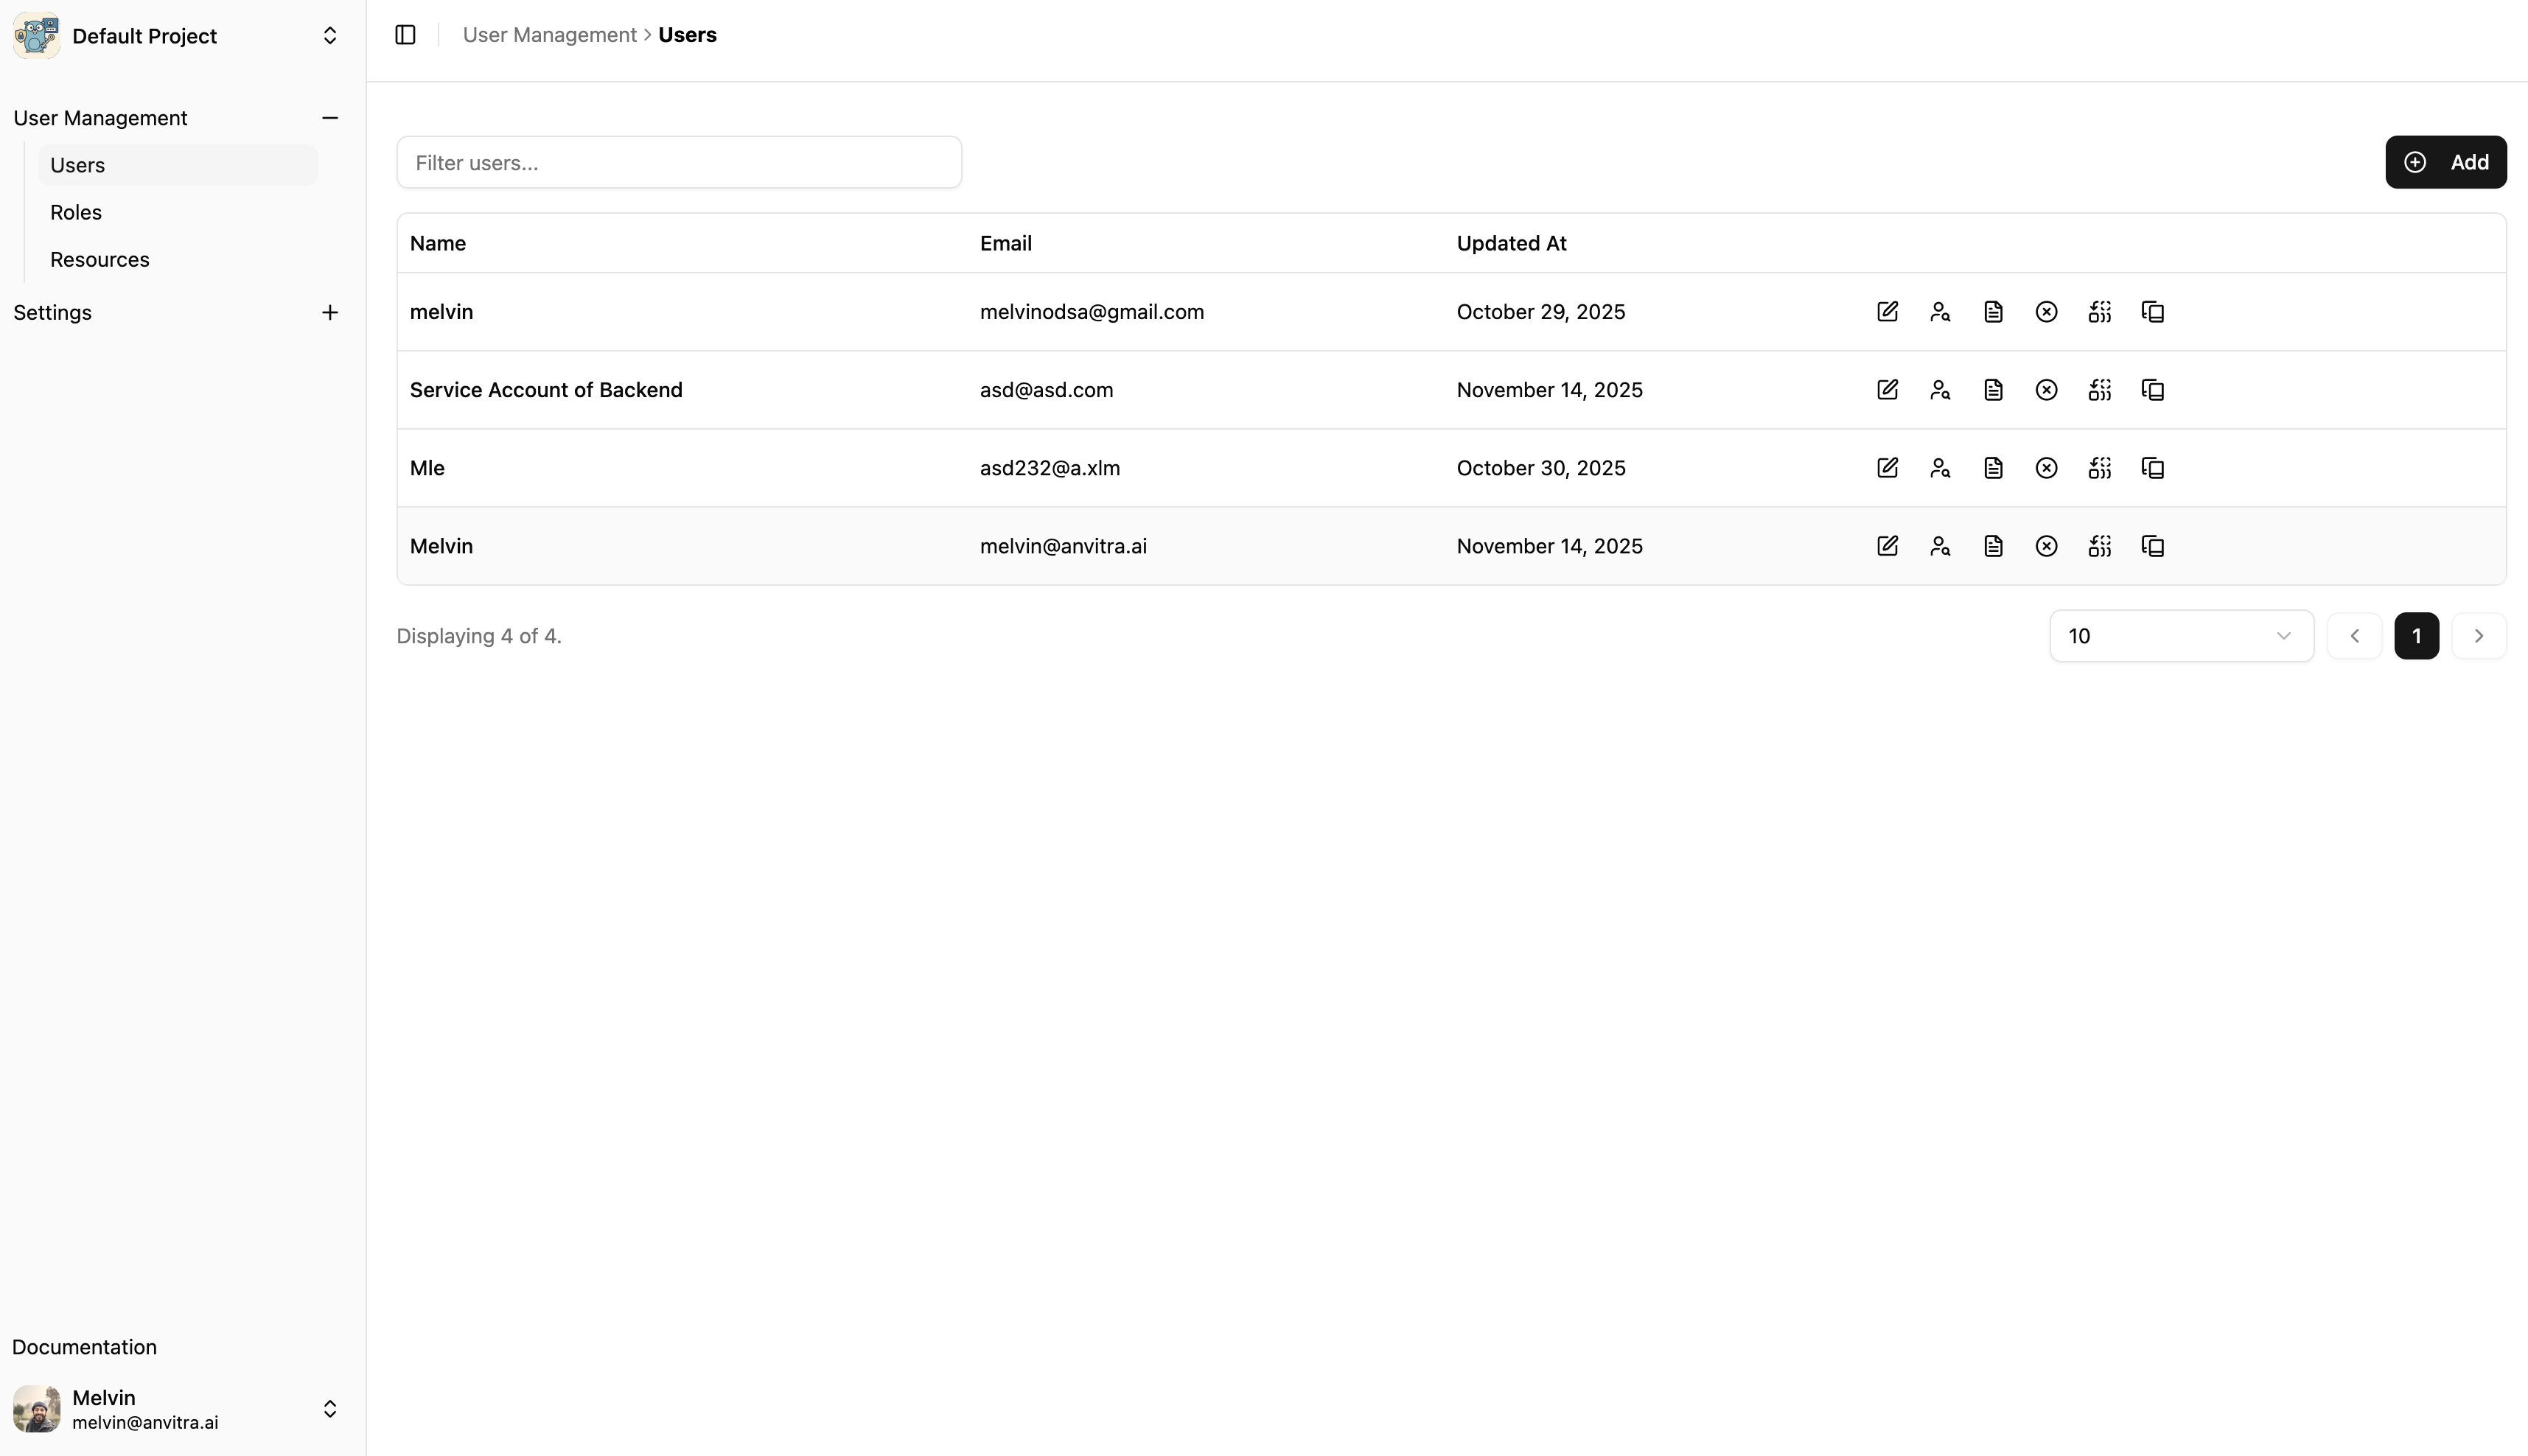
Users
Users are the individuals who will access your application. They can be assigned roles to define their permissions. When someone sign-up, their user is automatically created. Linked users will be automatically created when a client with service account is created. The email of the user will be specified in the client creation form.
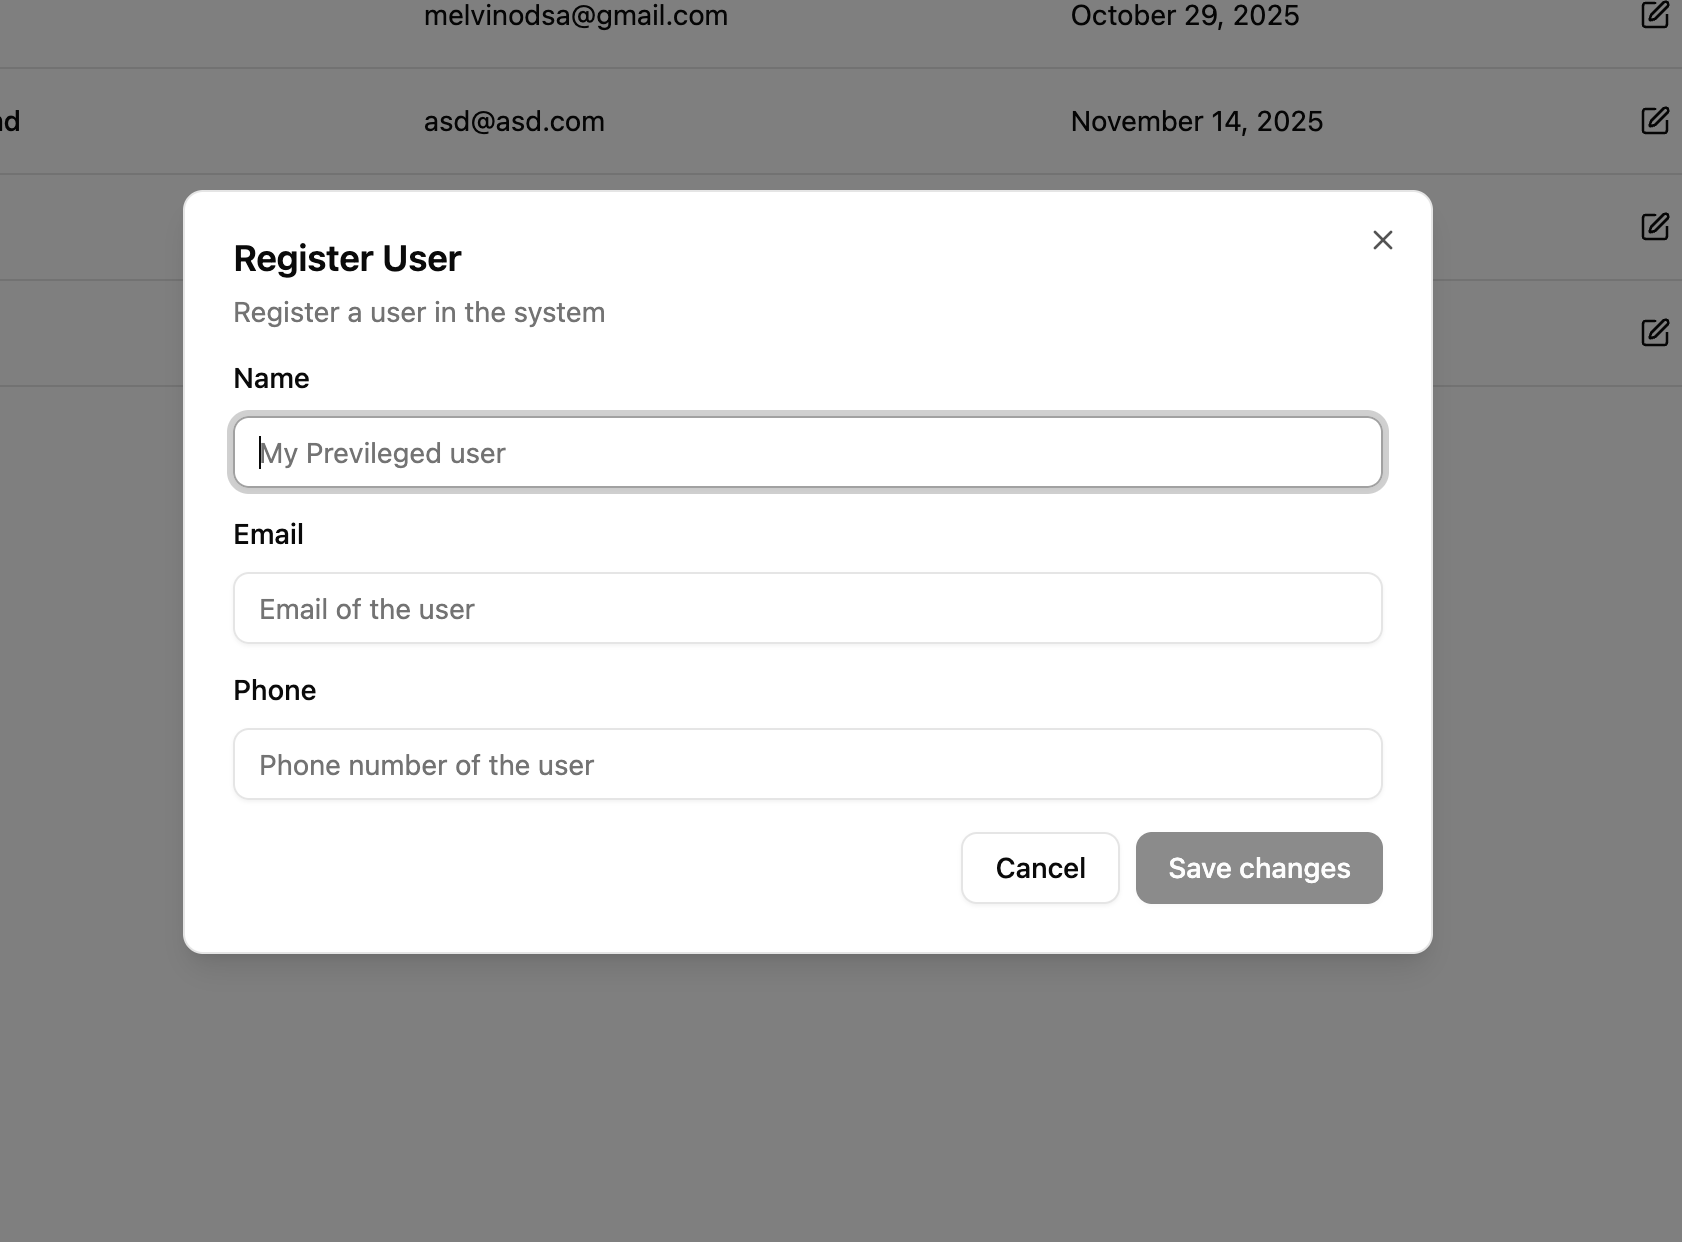
Createing a New User
Navigate to Users
Go to Users in the sidebar under User Management
List Users Page
Click on Add Button
Fill in the User Details
Email: User's email address
Name: User's full name
Phone: User's phone number (optional)
Save User
Click Save Changes button
Create User Widget
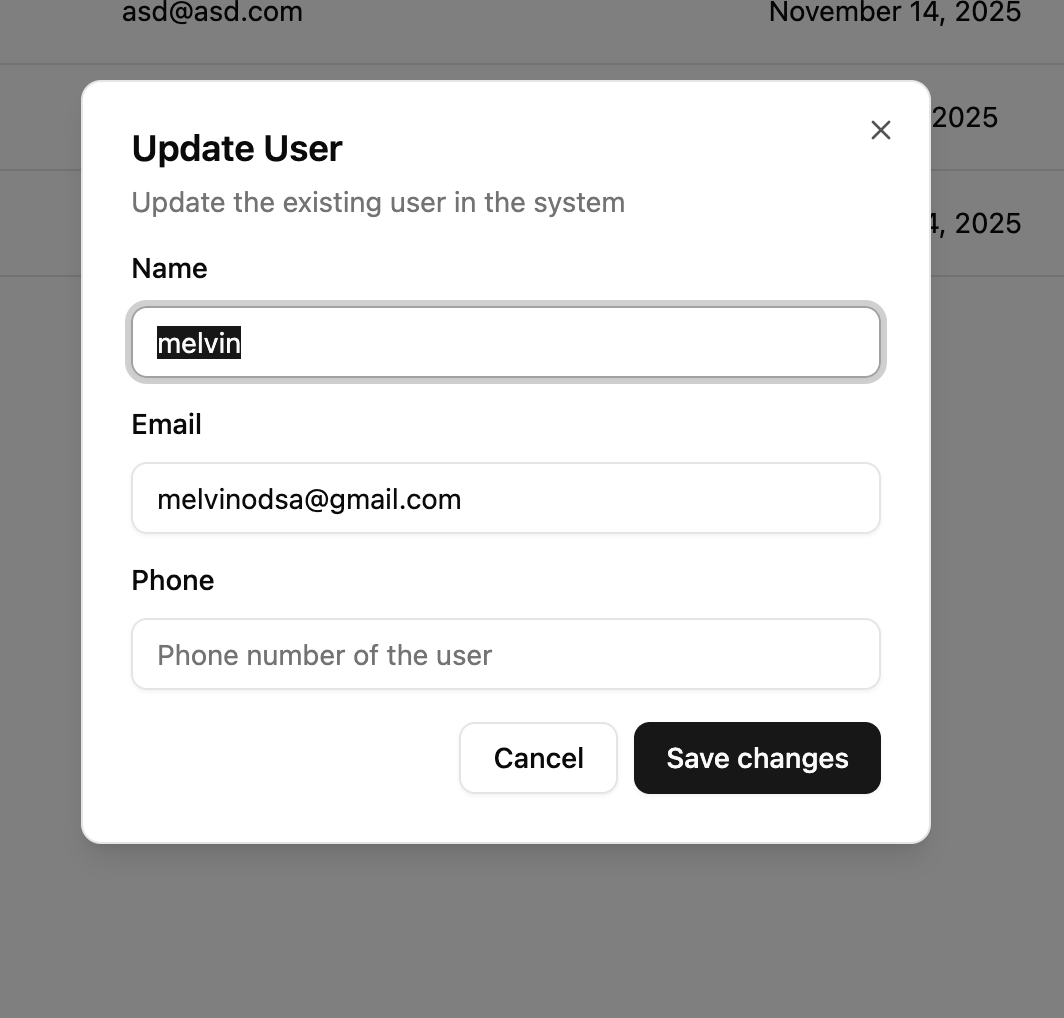
🔄 Updating user
To update an existing user, follow these steps:
Navigate to Users
Go to Users in the sidebar under User Management
Select User to Edit
Find the user in the list
Click the Edit button on the right side
Modify Details
Update Name, Phone, Email
Save Changes
Click Save Changes to apply updates
Update User Widget
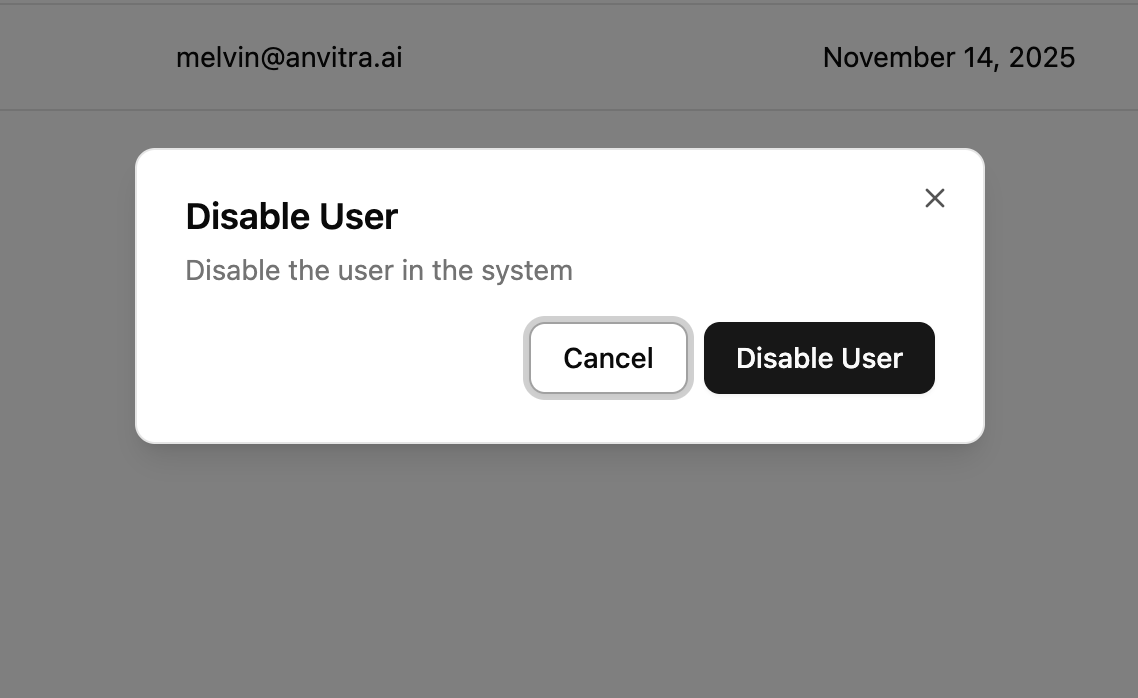
Disable User
To disable a user, follow these steps:
Navigate to Users
Go to Users in the sidebar under User Management
Select User to Disable
Find the user in the list
Click the Disable button on the right side
Confirm Disable
A confirmation dialog will appear
Click Disable User to permanently disable the user
Disable User Confirmation Widget
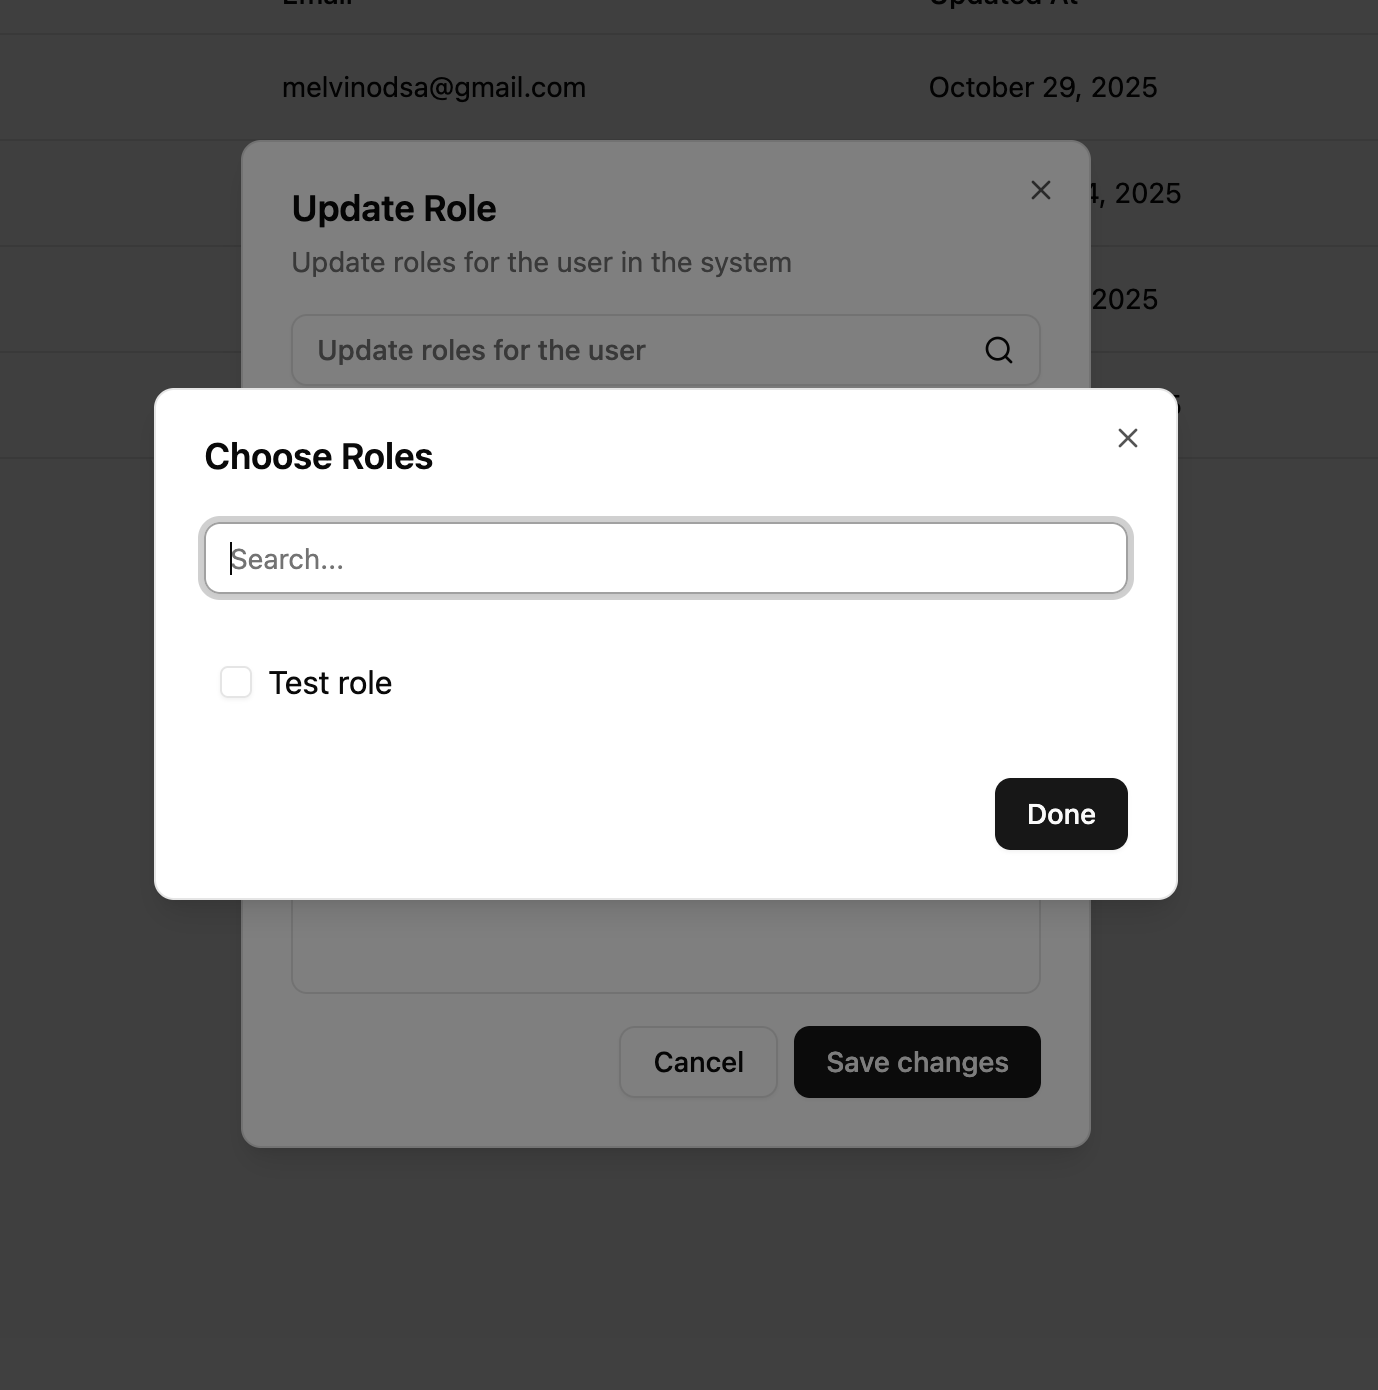
Updating User Roles
To update the roles assigned to a user, follow these steps:
Navigate to Users
Go to Users in the sidebar under User Management
Select User to Update Roles
Find the user in the list
Click the Edit Roles button on the right side
Modify Roles
Select or deselect roles to assign or remove them from the user
Save Changes
Click Save Changes to apply updates
Update User Roles Widget
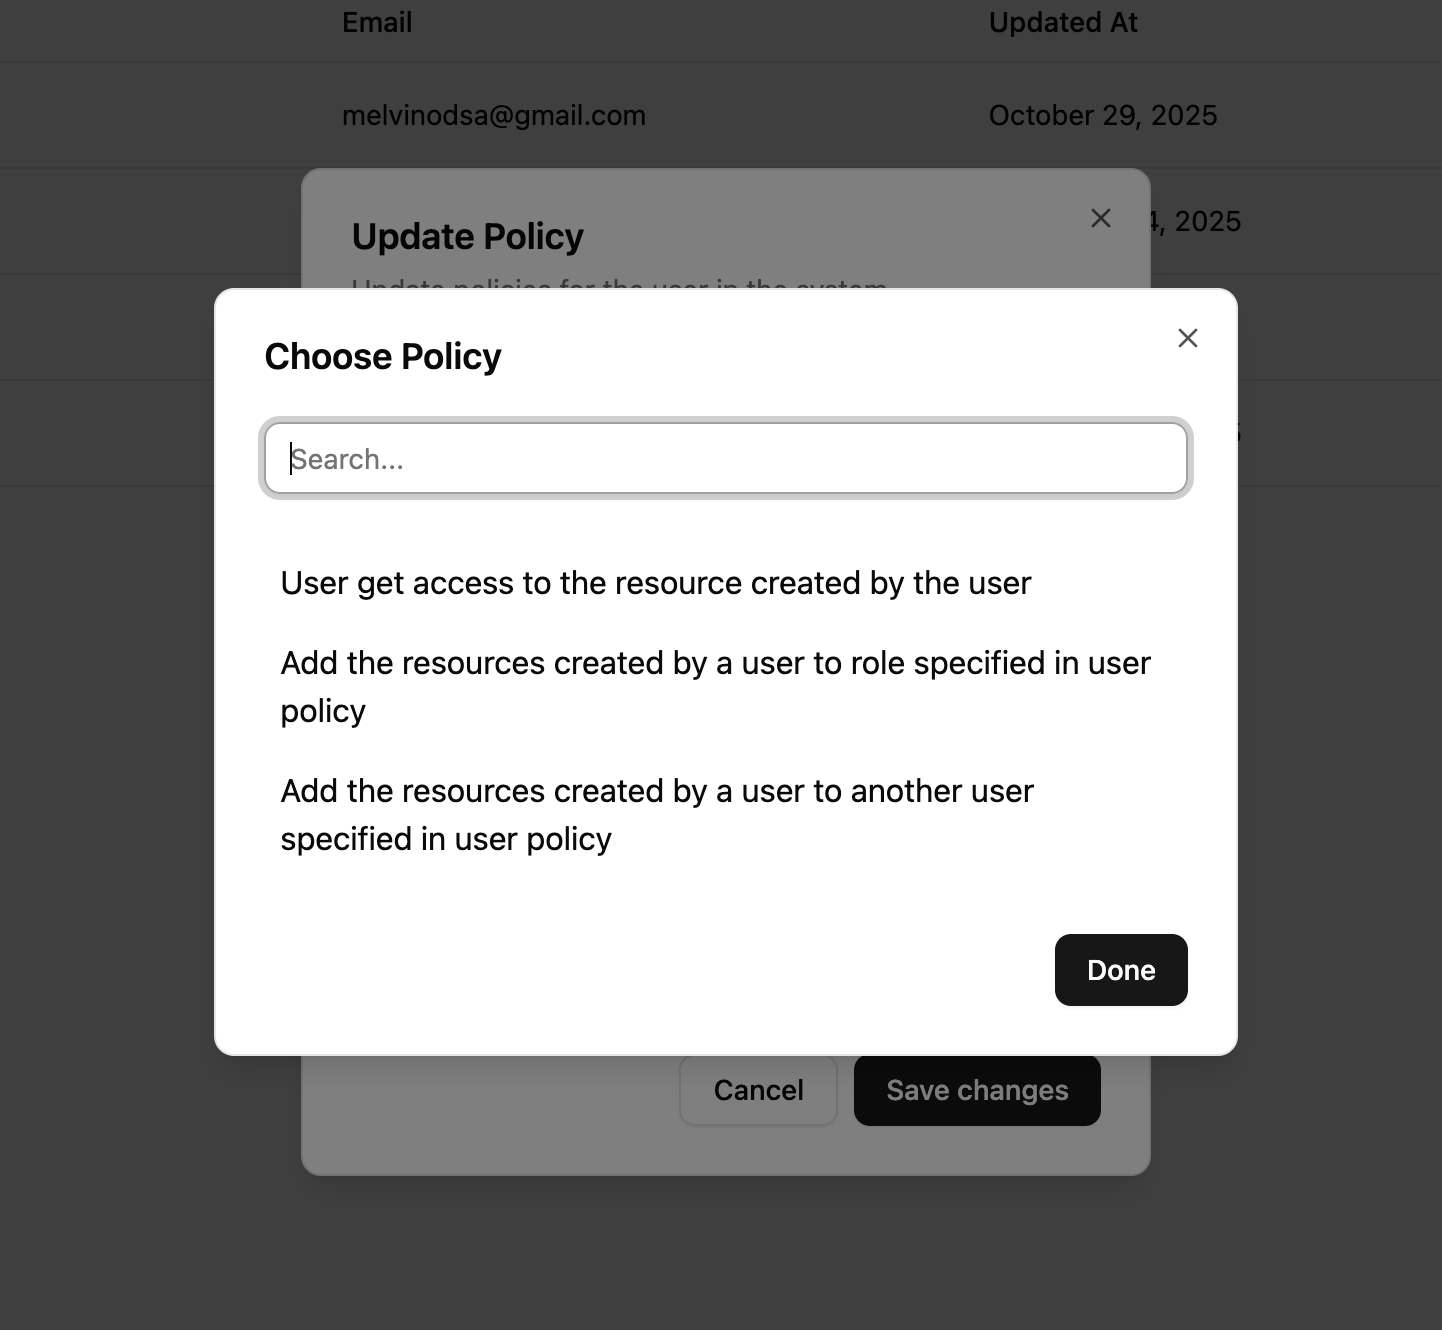
Updating User Policies
Unline roles, resources the user get access via policies doesn't get removed if you remove a policy from a user.
To update the policies assigned to a user, follow these steps:
Navigate to Users
Go to Users in the sidebar under User Management
Select User to Update Policies
Find the user in the list
Click the Edit Policies button on the right side
Modify Policies
Select the policies to assign to the user. Based on the policy you might have to select other user/roles to which the policy should be associated with the user
Save Changes
Click Save Changes to apply updates
Update User Policies Widget
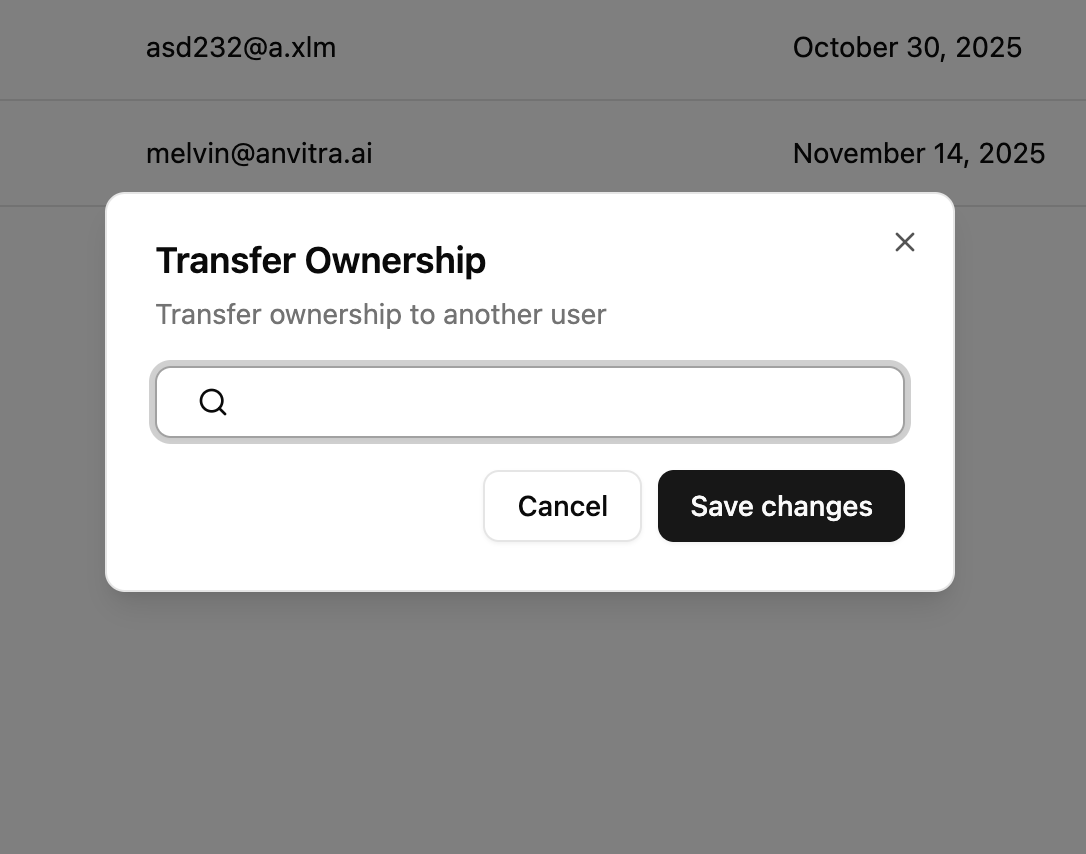
Transfering Ownership
To transfer ownership of a user to another user, follow these steps:
Navigate to Users
Go to Users in the sidebar under User Management
Select User to Transfer Ownership
Find the user in the list
Click the Transfer Ownership button on the right side
Select New Owner
Choose the user who will become the new owner
Confirm Transfer
Click Save Changes to complete the process
Transfer Ownership Confirmation Widget
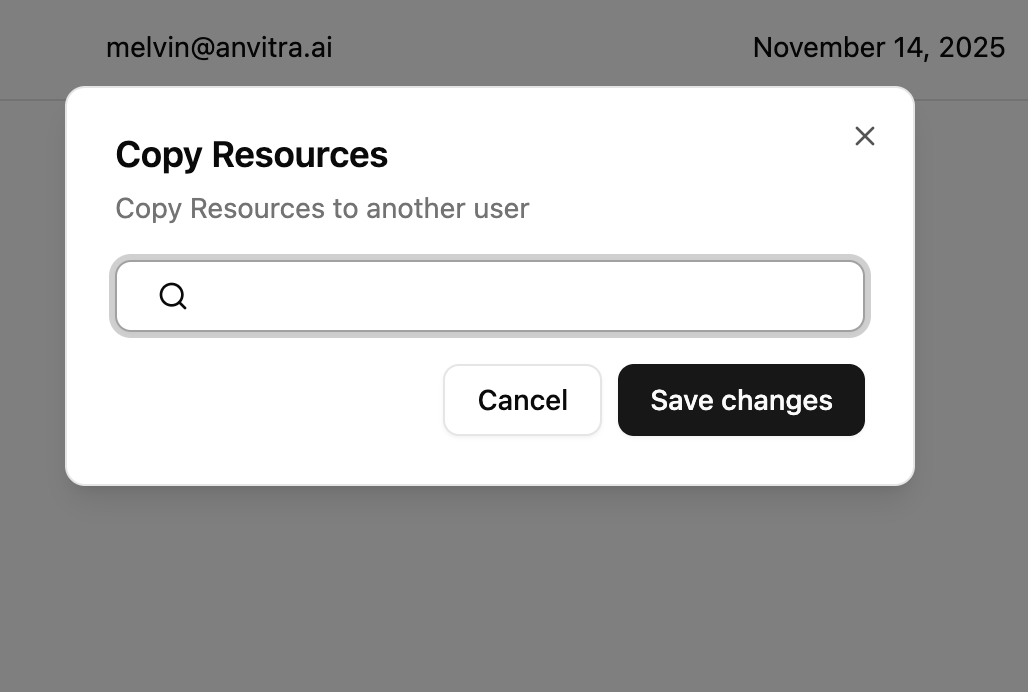
Copy User Resources
To copy resources from one user to another, follow these steps:
Navigate to Users
Go to Users in the sidebar under User Management
Select User to Copy Resources
Find the user in the list
Click the Copy Resources button on the right side
Select Target User
Choose the user who will receive the copied resources